Skip to content
Finished walk-in shower in a San Diego bathroom remodel, with large-format marble-look tile, a mosaic niche band and a mosaic floor
Bathroom RemodelSan Diego, California

Walk-In Shower & Bathroom Remodel in San Diego

A full bathroom rebuild taken back to the studs — new valve and drain positions, a waterproofed walk-in shower in large-format marble-look tile, and matte black fixtures throughout.

Walk-in showerTaken to the studsMosaic nicheMatte black fixturesLinear drainPermitted
Bathroom
Project type
San Diego
California
To the studs
Full rebuild
CSLB #1083621
Permitted & inspected
01
Stage one

What a bathroom looks like before any of it shows

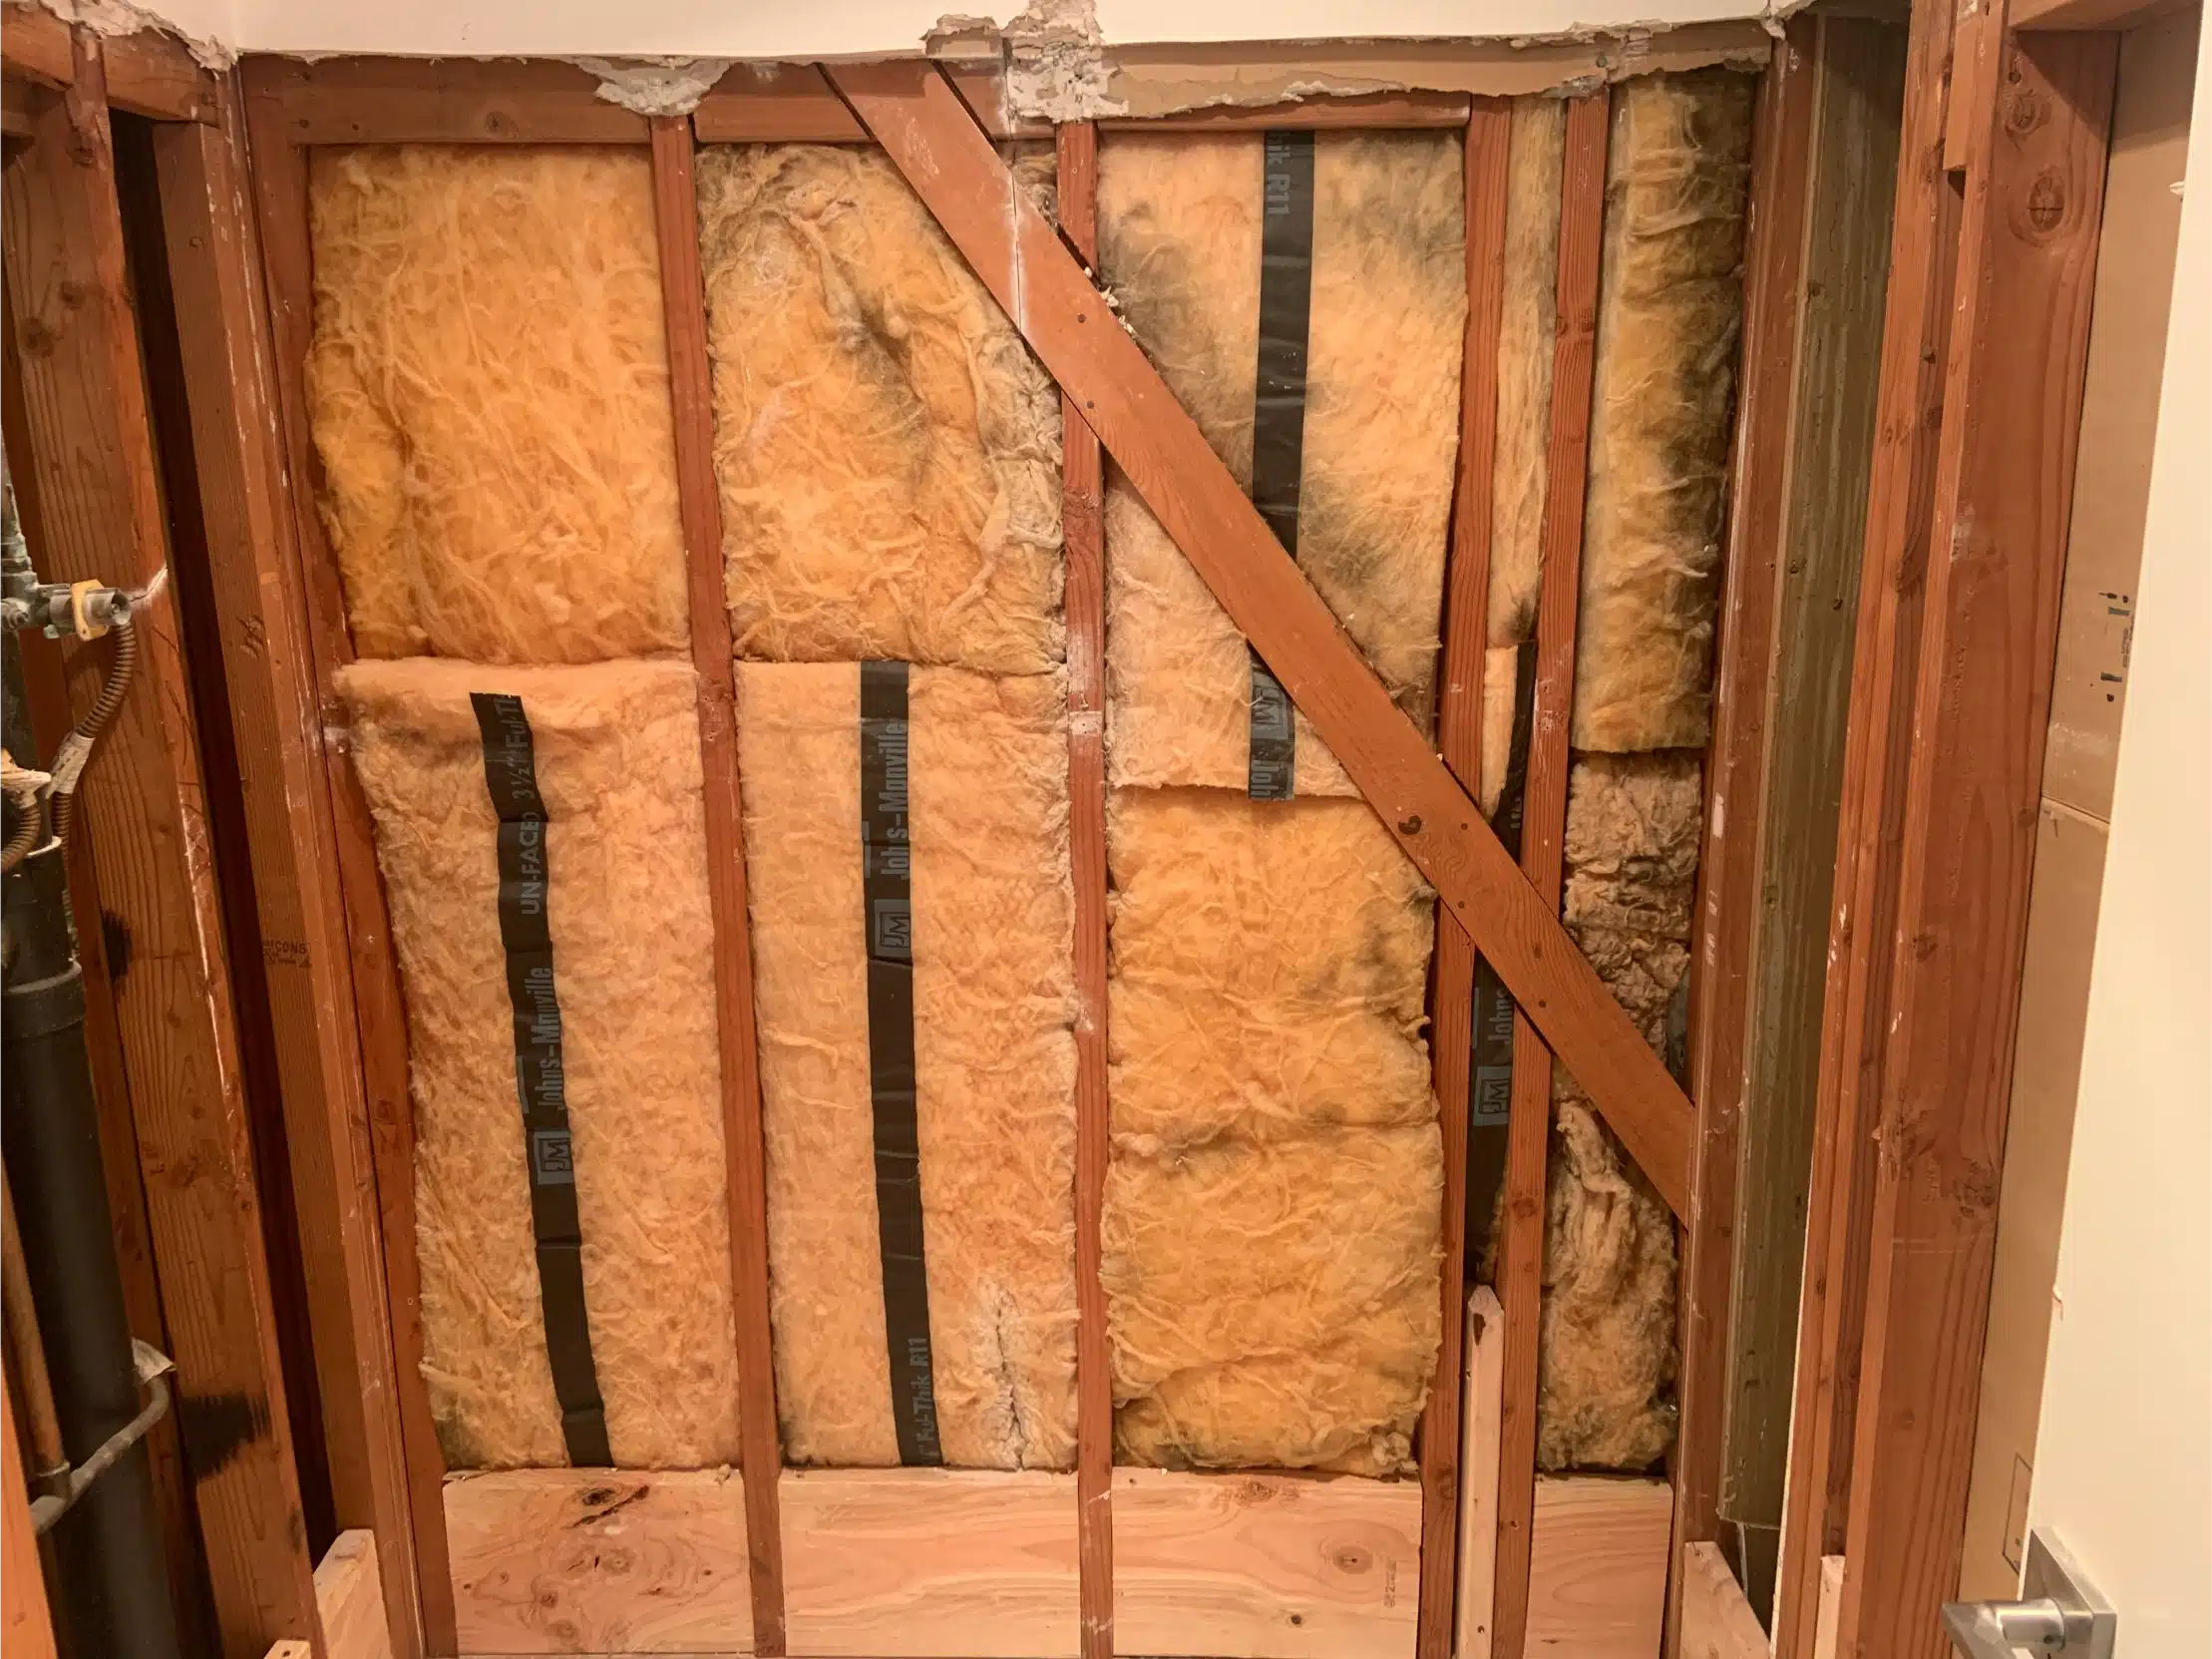
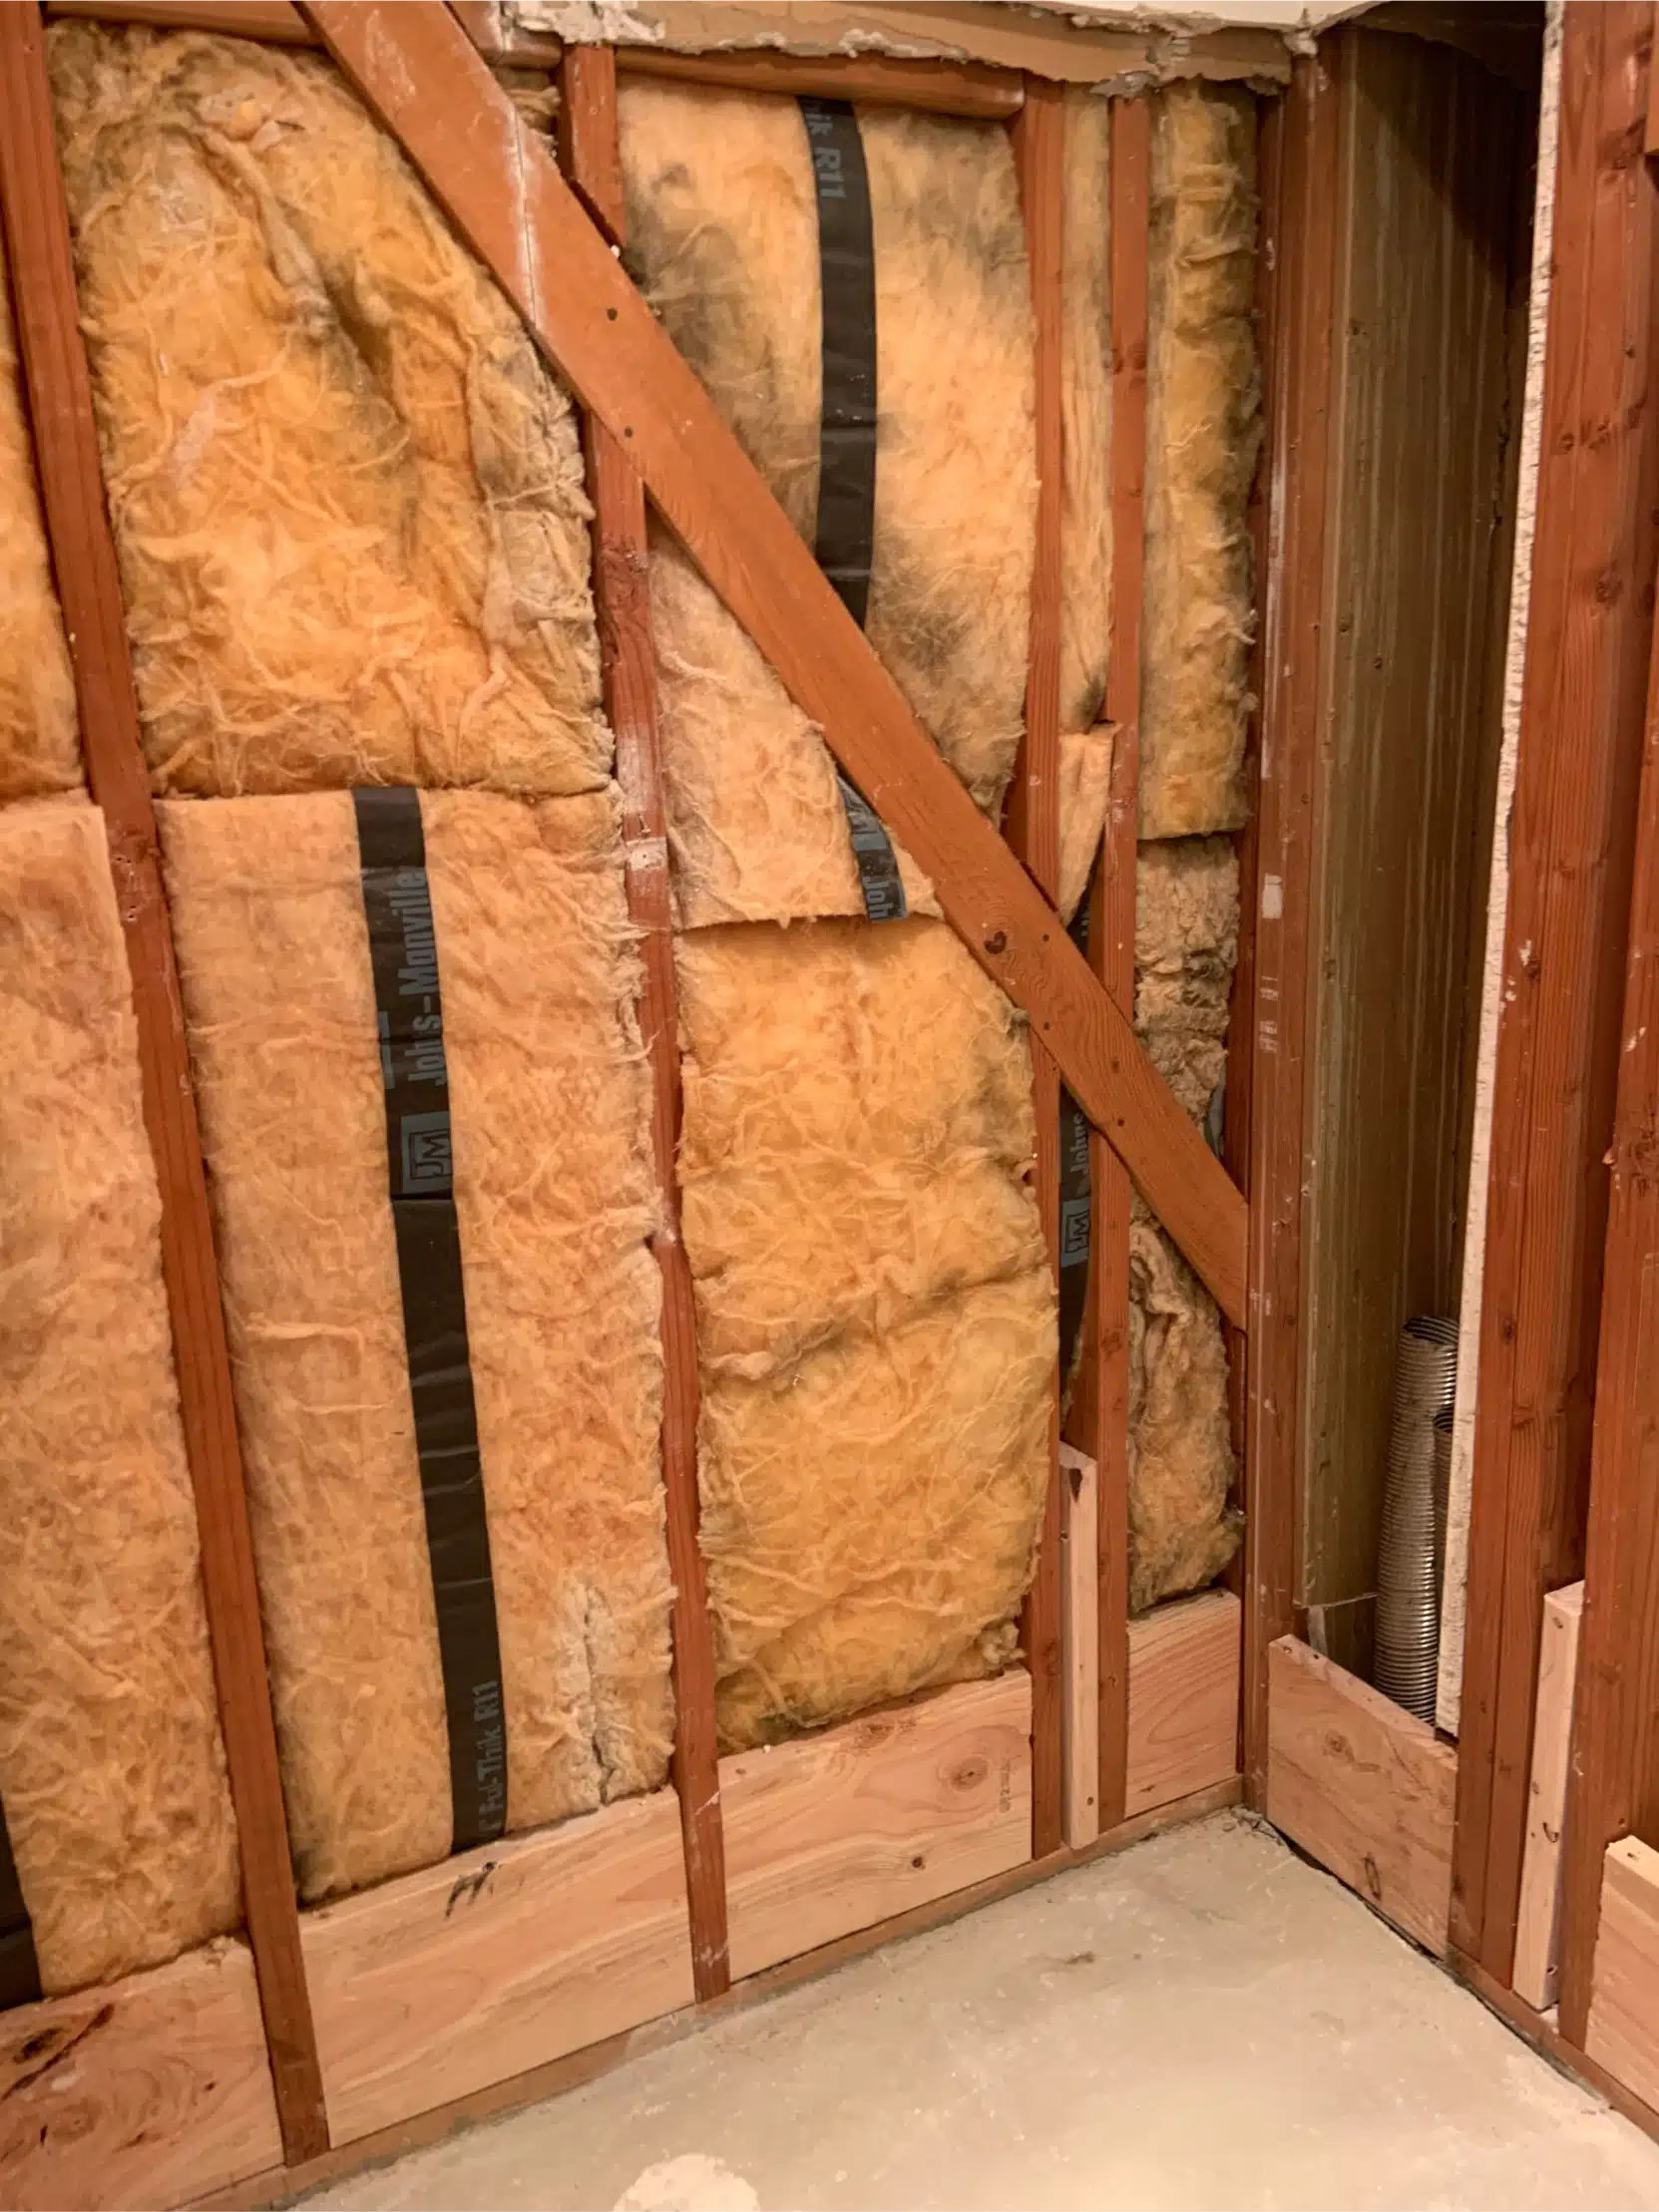
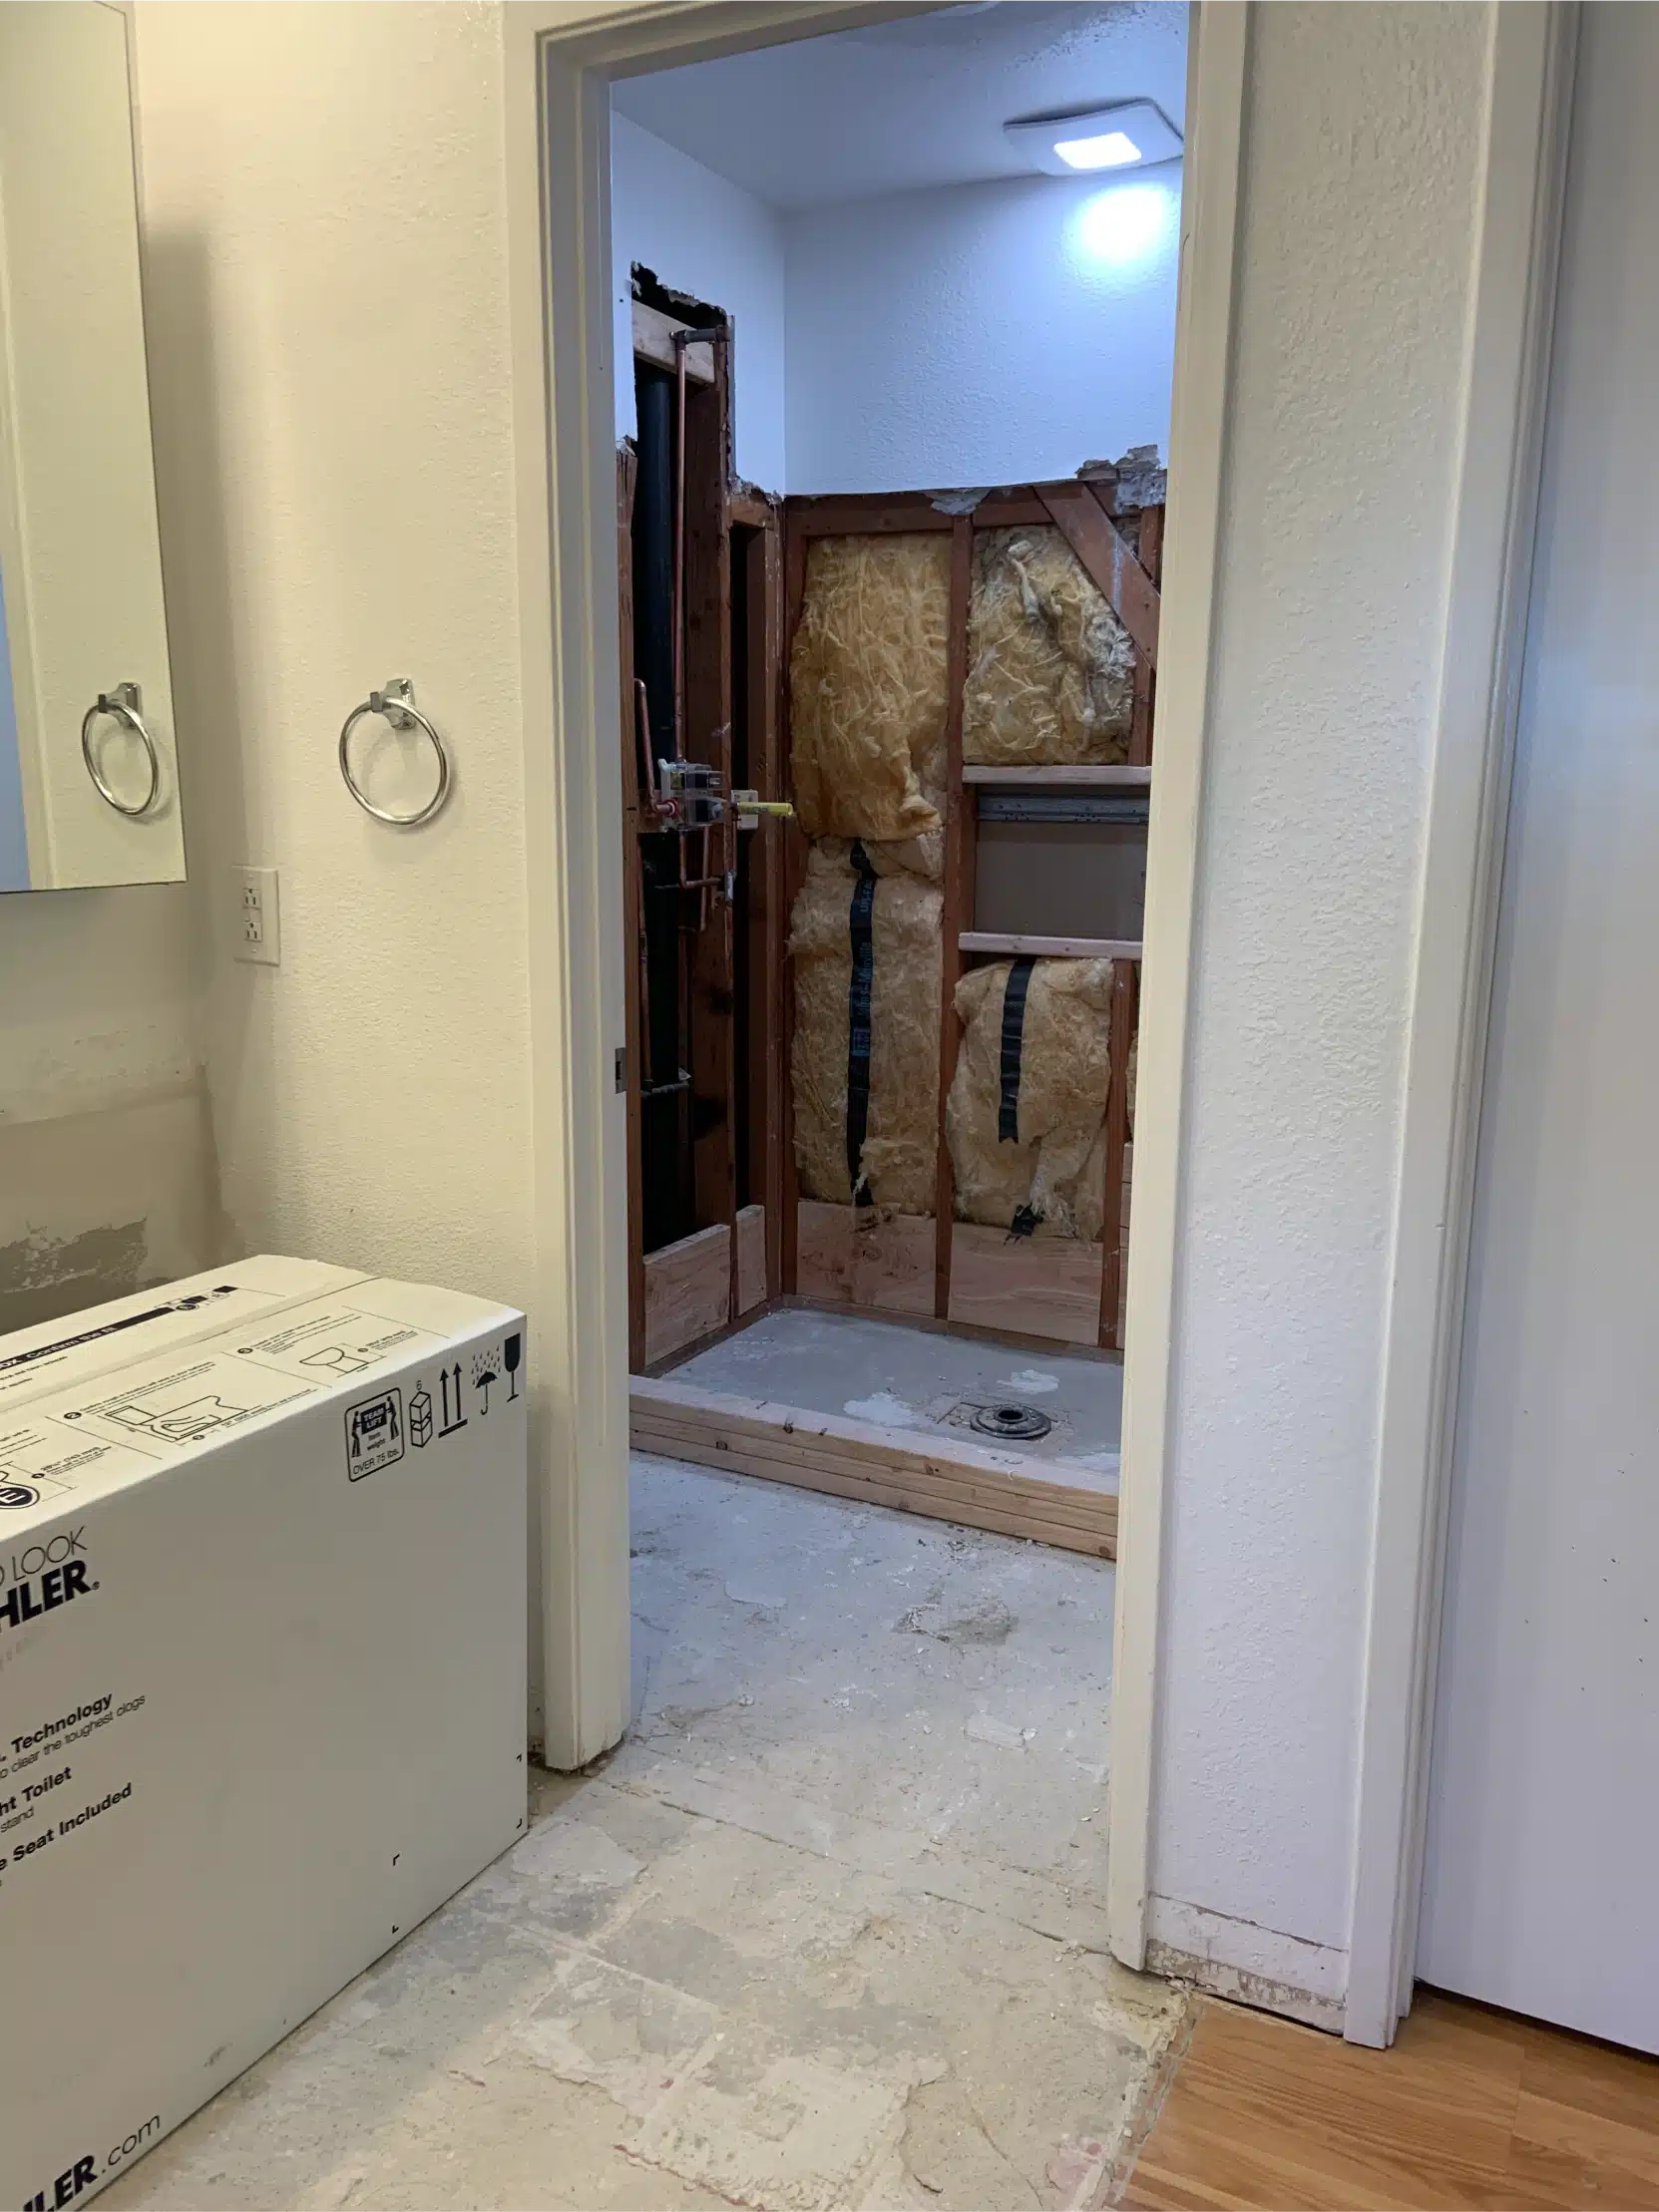
Most bathroom photographs start at the finish. This one starts where the work actually happens: studs open, insulation in, the shower valve and mixer set at their final heights, and solid blocking framed around the niche opening before a single tile is ordered.

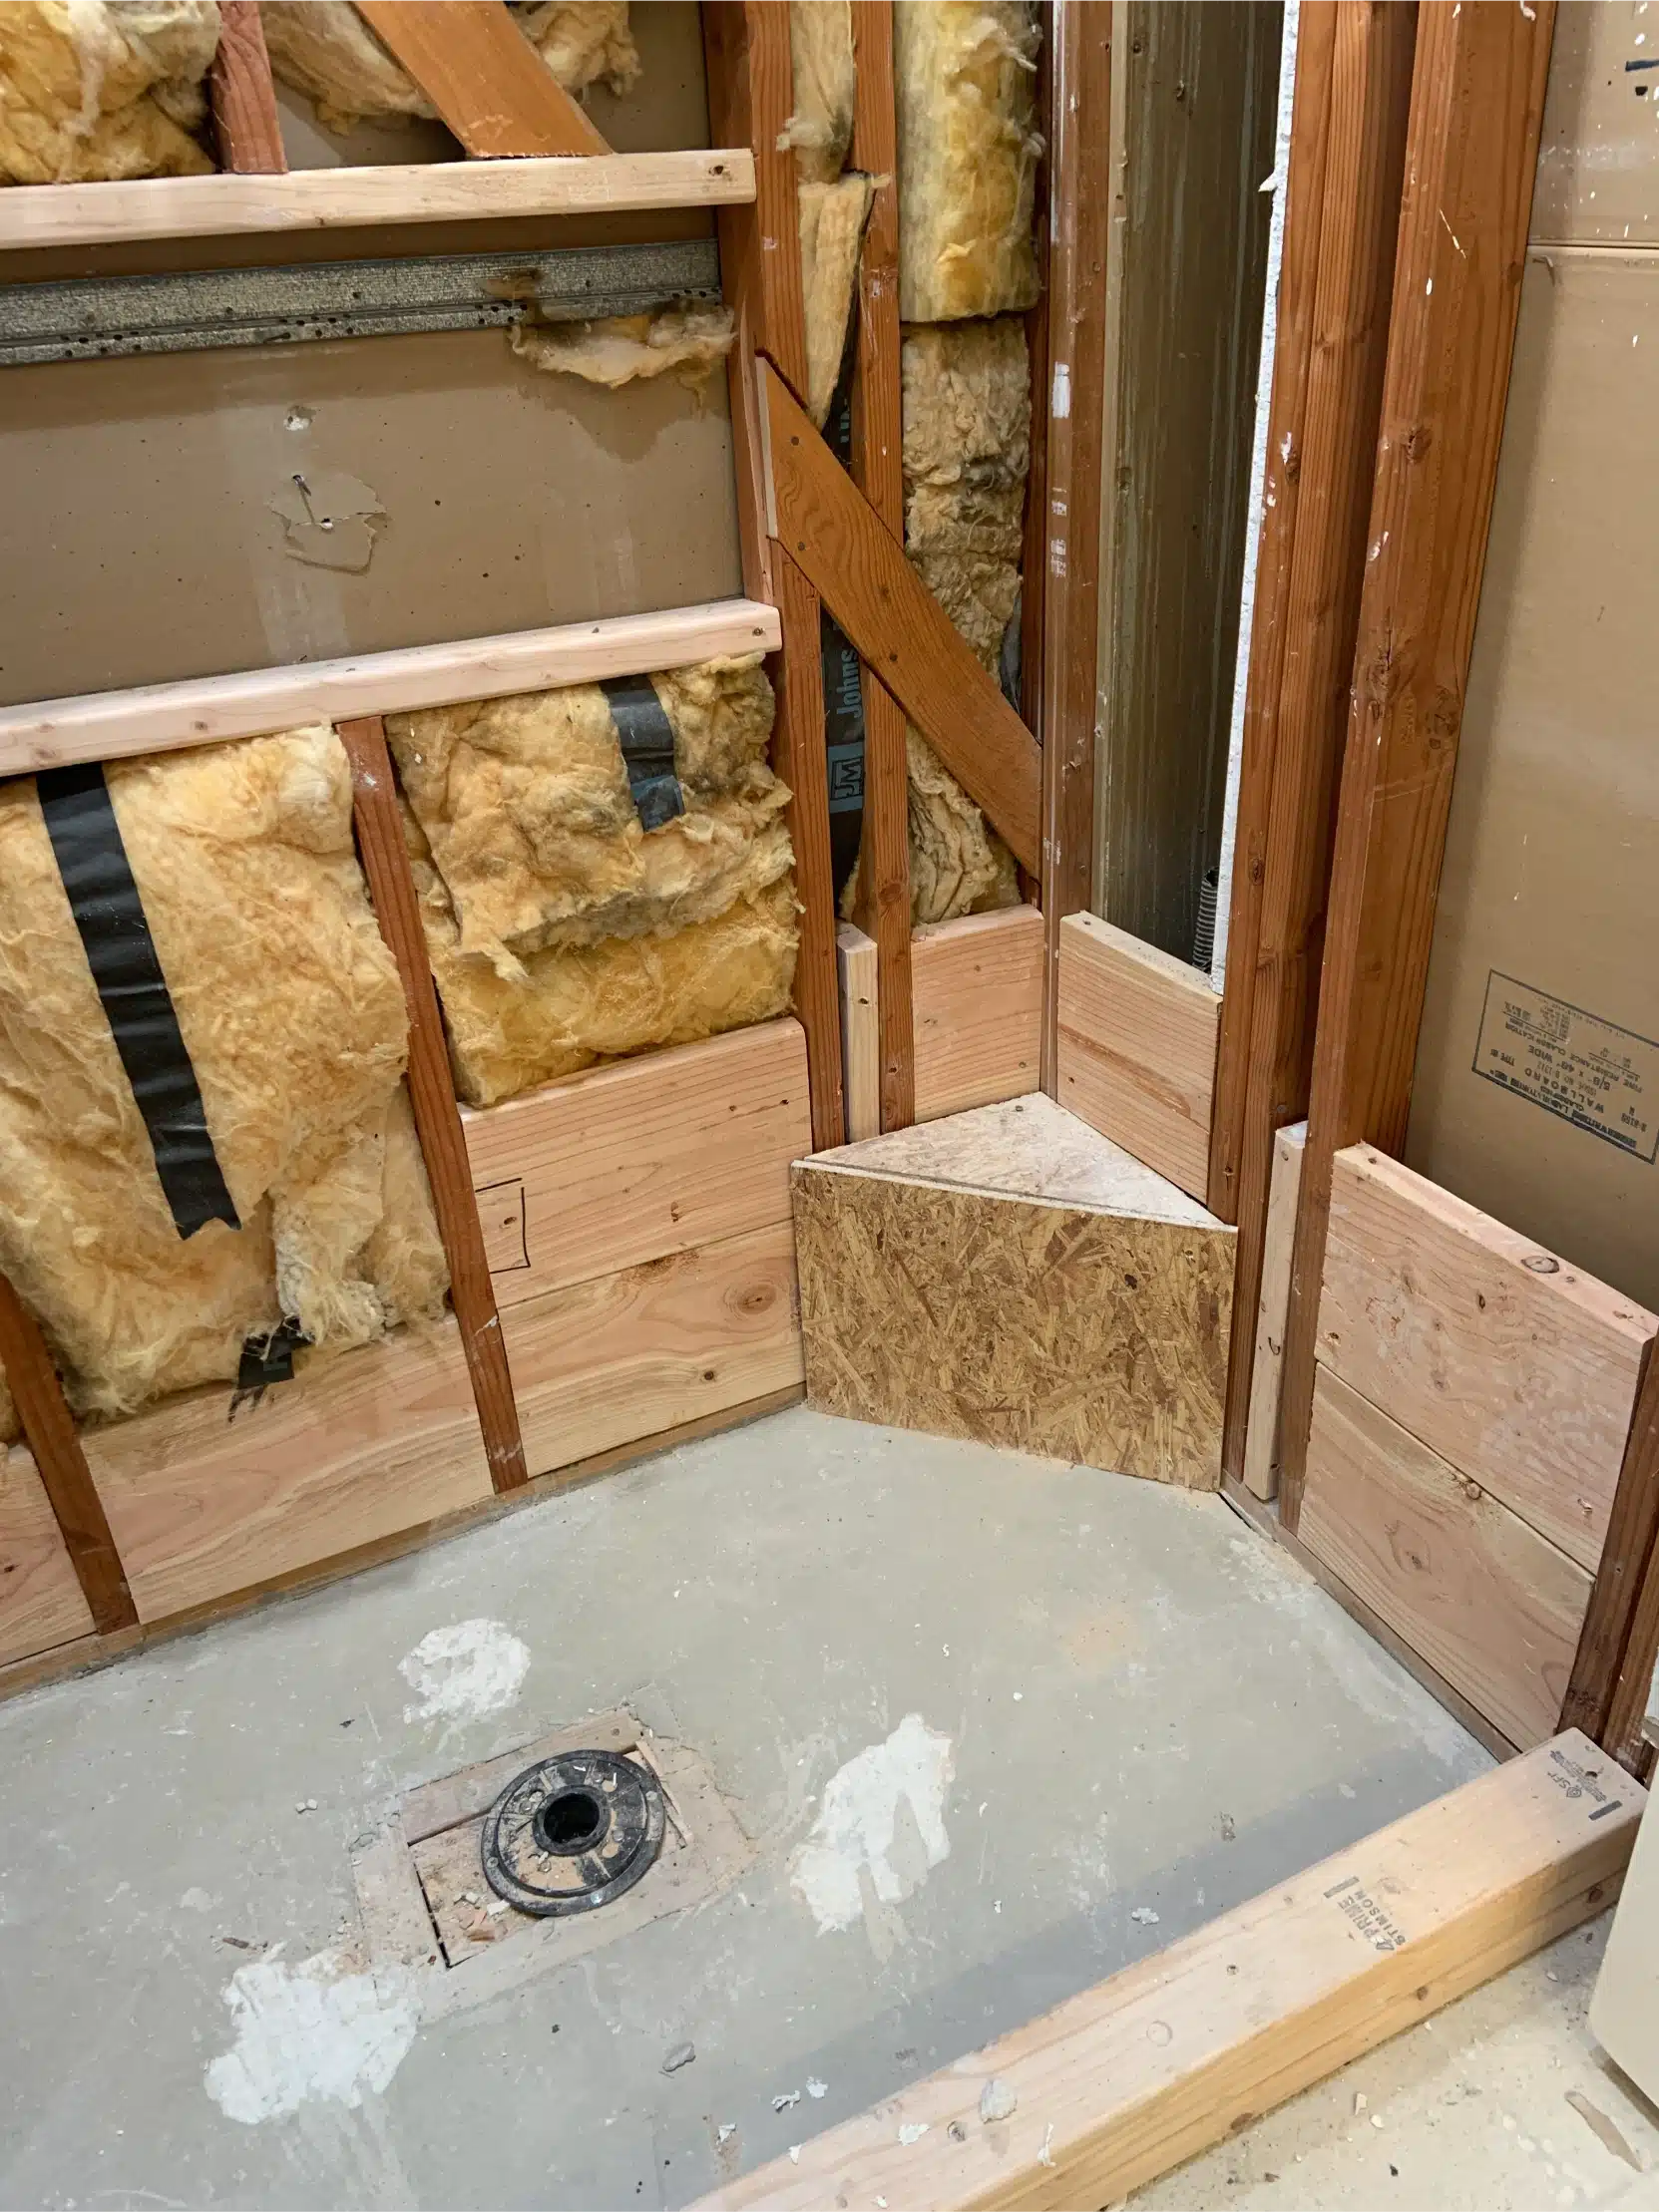
Blocking is the detail worth pointing at. A recessed niche needs framing behind it to carry the weight of tile and stone, and a bench or grab bar needs blocking placed before the walls close. Once the substrate goes on, those decisions are fixed — you cannot add them later without opening the wall again.

Valve height, drain position and fall to the drain are all set at this stage too. Everything that determines whether a shower drains properly for the next twenty years is decided here, with the walls open.
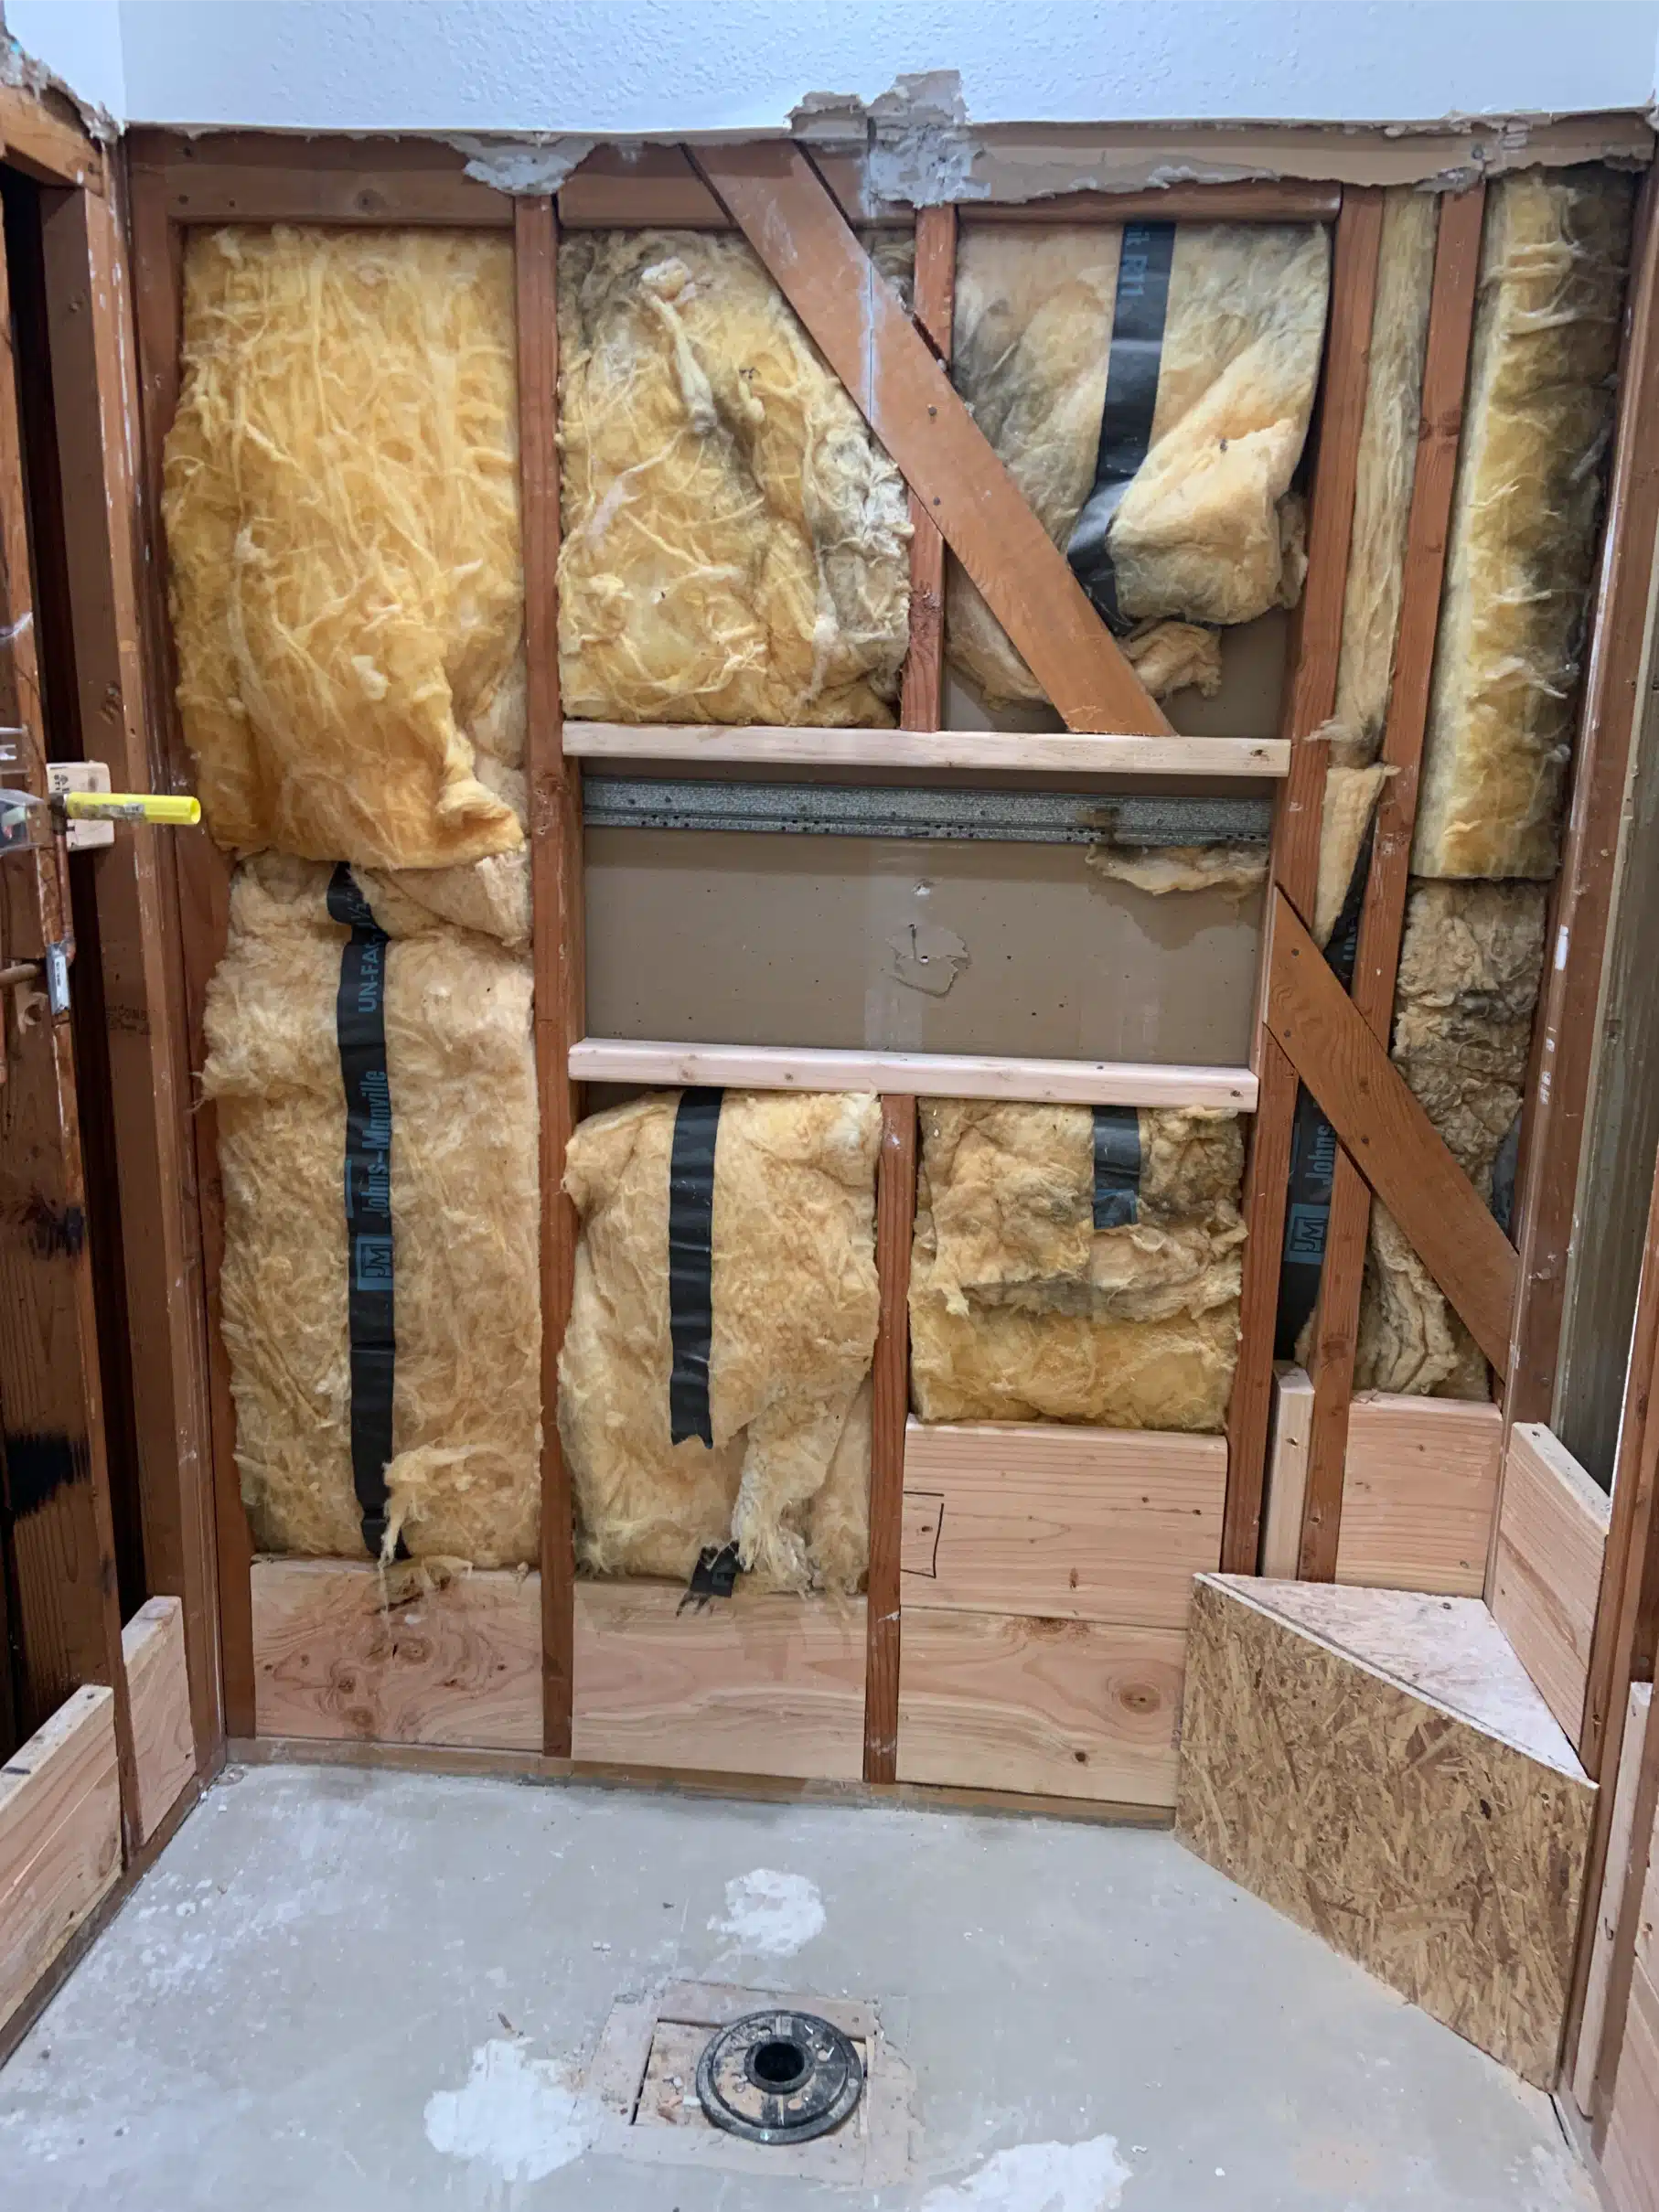
Bathroom taken back to the studs, showing insulation, the roughed-in shower valve and blocking framed around the niche opening Rough-in · During
How it was built

Four stages, in the order they happened

The same bathroom at each stage — stripped to the studs, blocked and roughed in, tiled with the clips still on, then finished.

The shower wall stripped to the studs with insulation and bracing visible
Strip-out

Back to the studs

Everything out, so what is behind the wall is known before anything is ordered rather than found mid-build.

Blocking and bracing framed into the open wall around the niche opening
Blocking

Framed for what comes later

Solid blocking set behind the niche and the fixings. Once the substrate is on, none of this can be added without opening the wall again.

The shower pan formed and the walls prepared before waterproofing
Pan & membrane

Fall set, then sealed

The pan formed to fall toward the drain and the membrane run continuous up the walls. This is the layer that actually keeps water out.

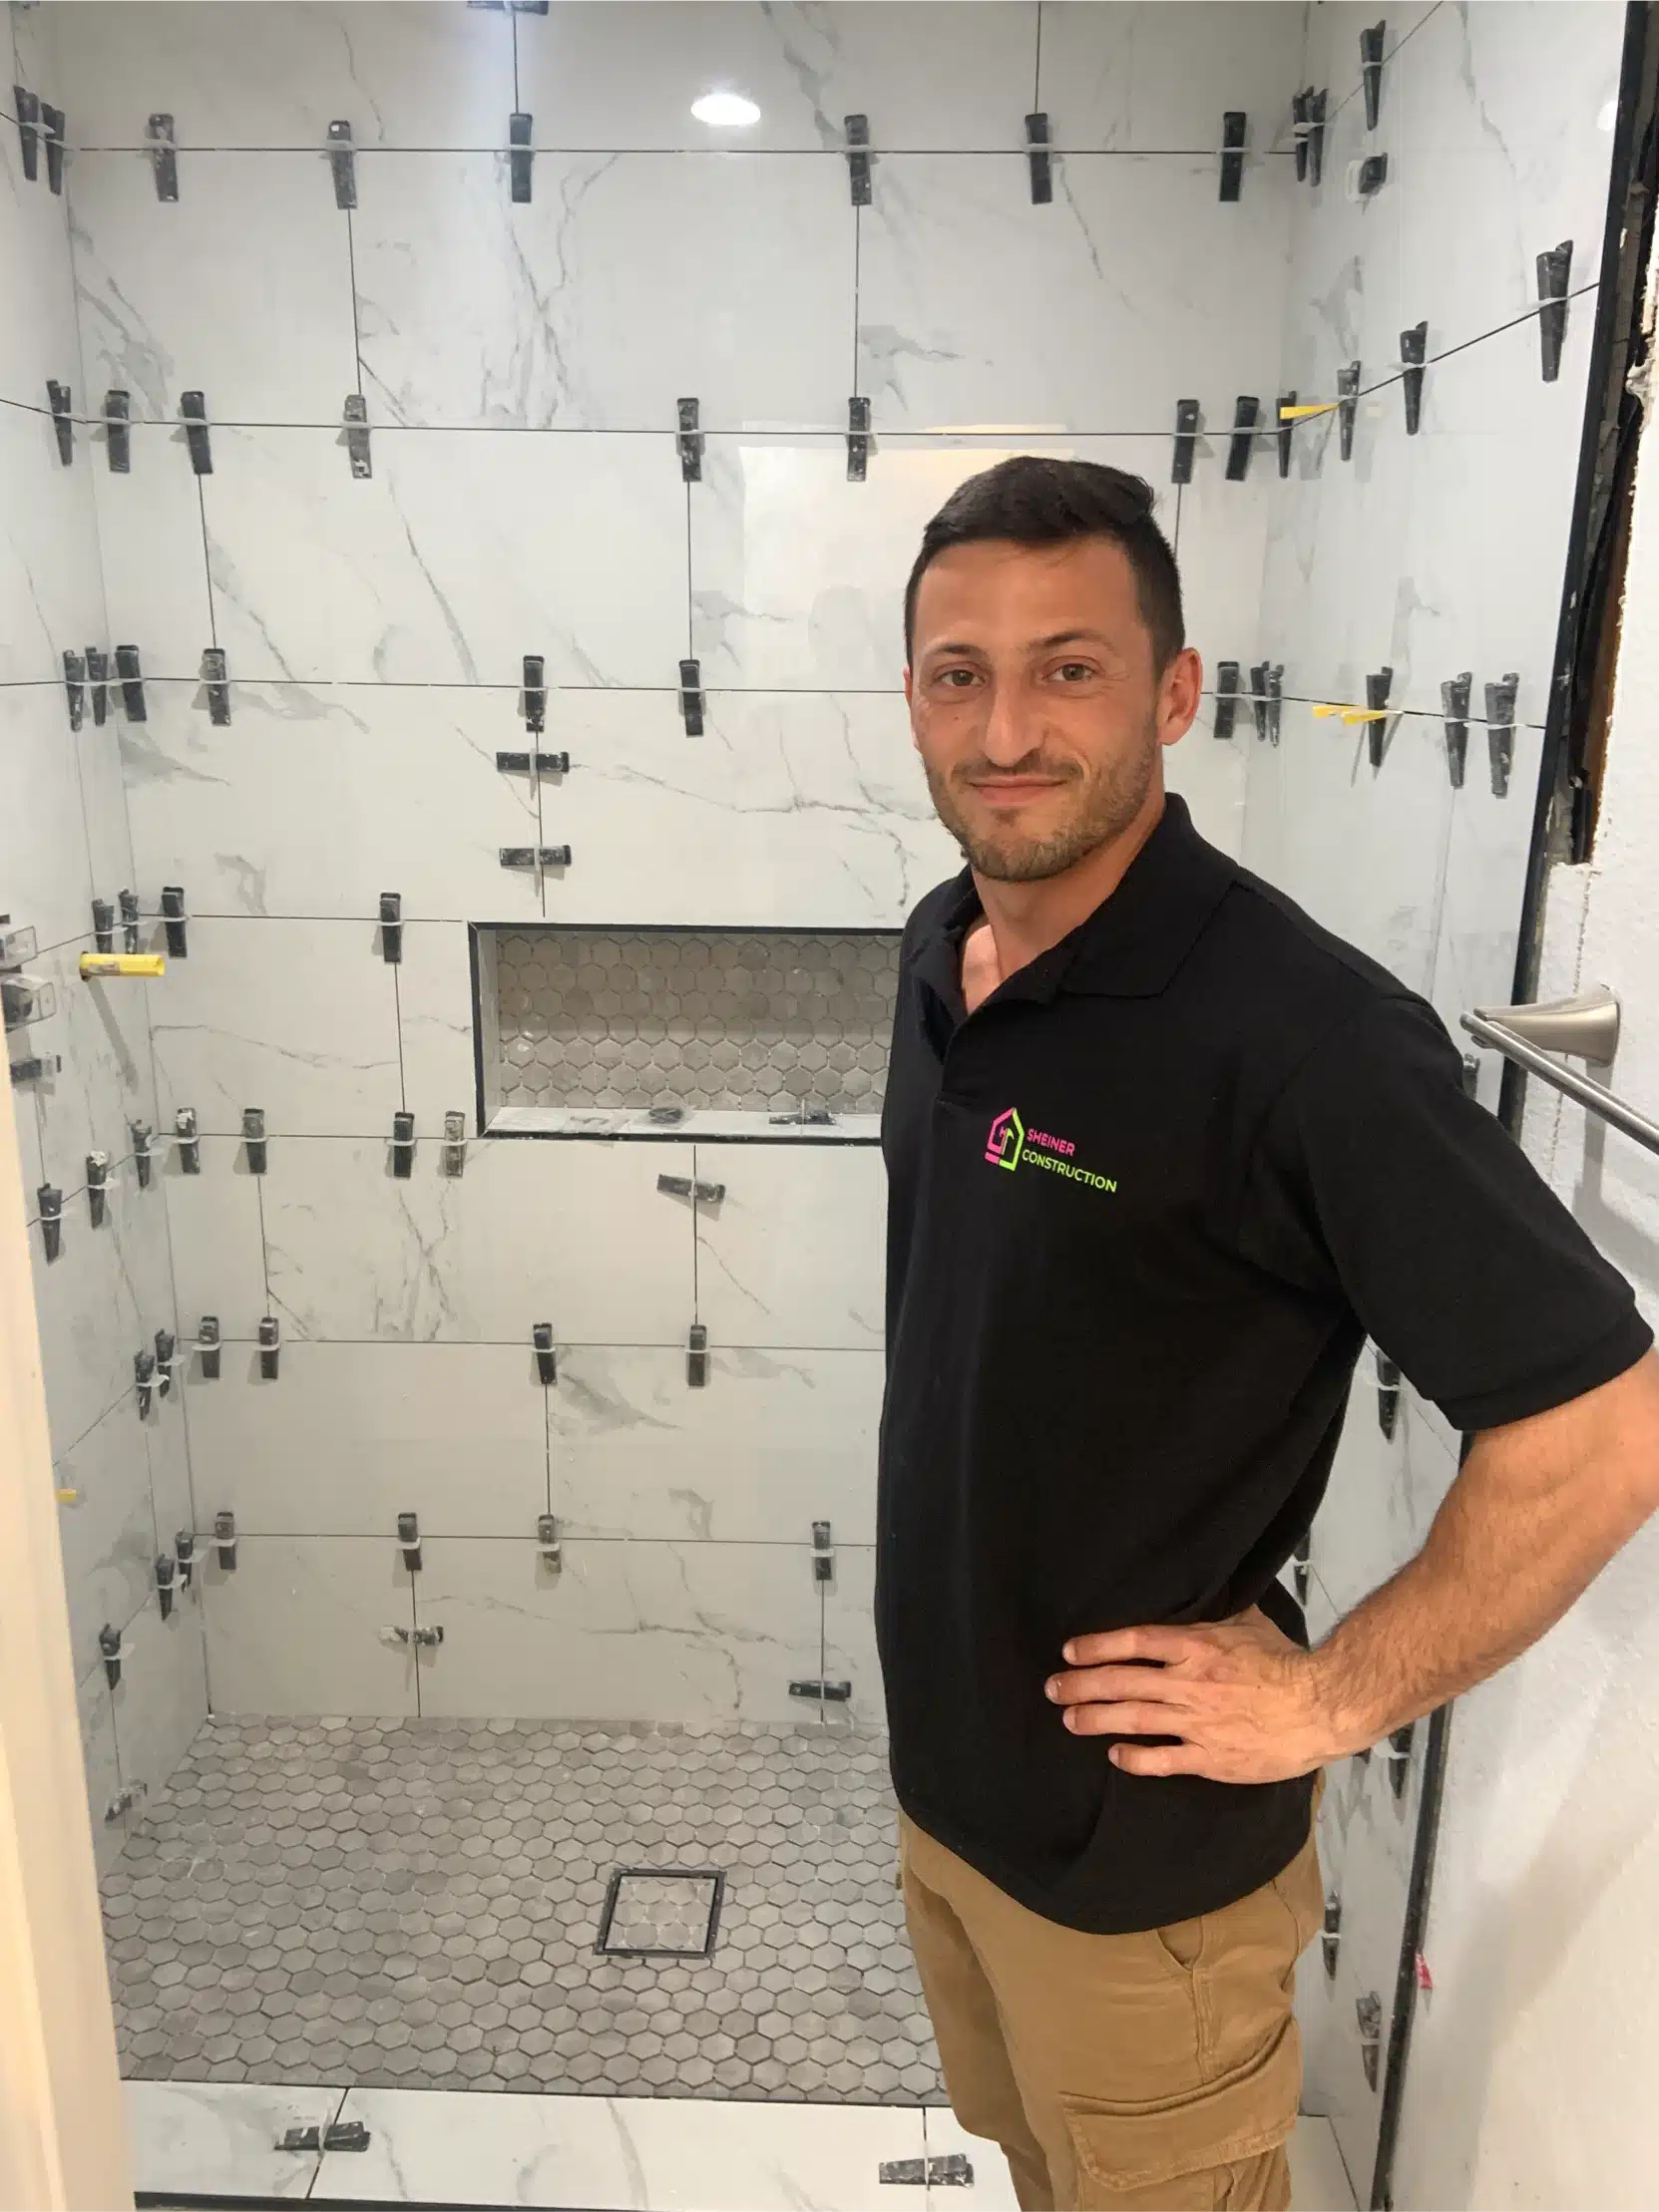
The shower fully tiled with levelling clips still in place
Tile

Set & levelled

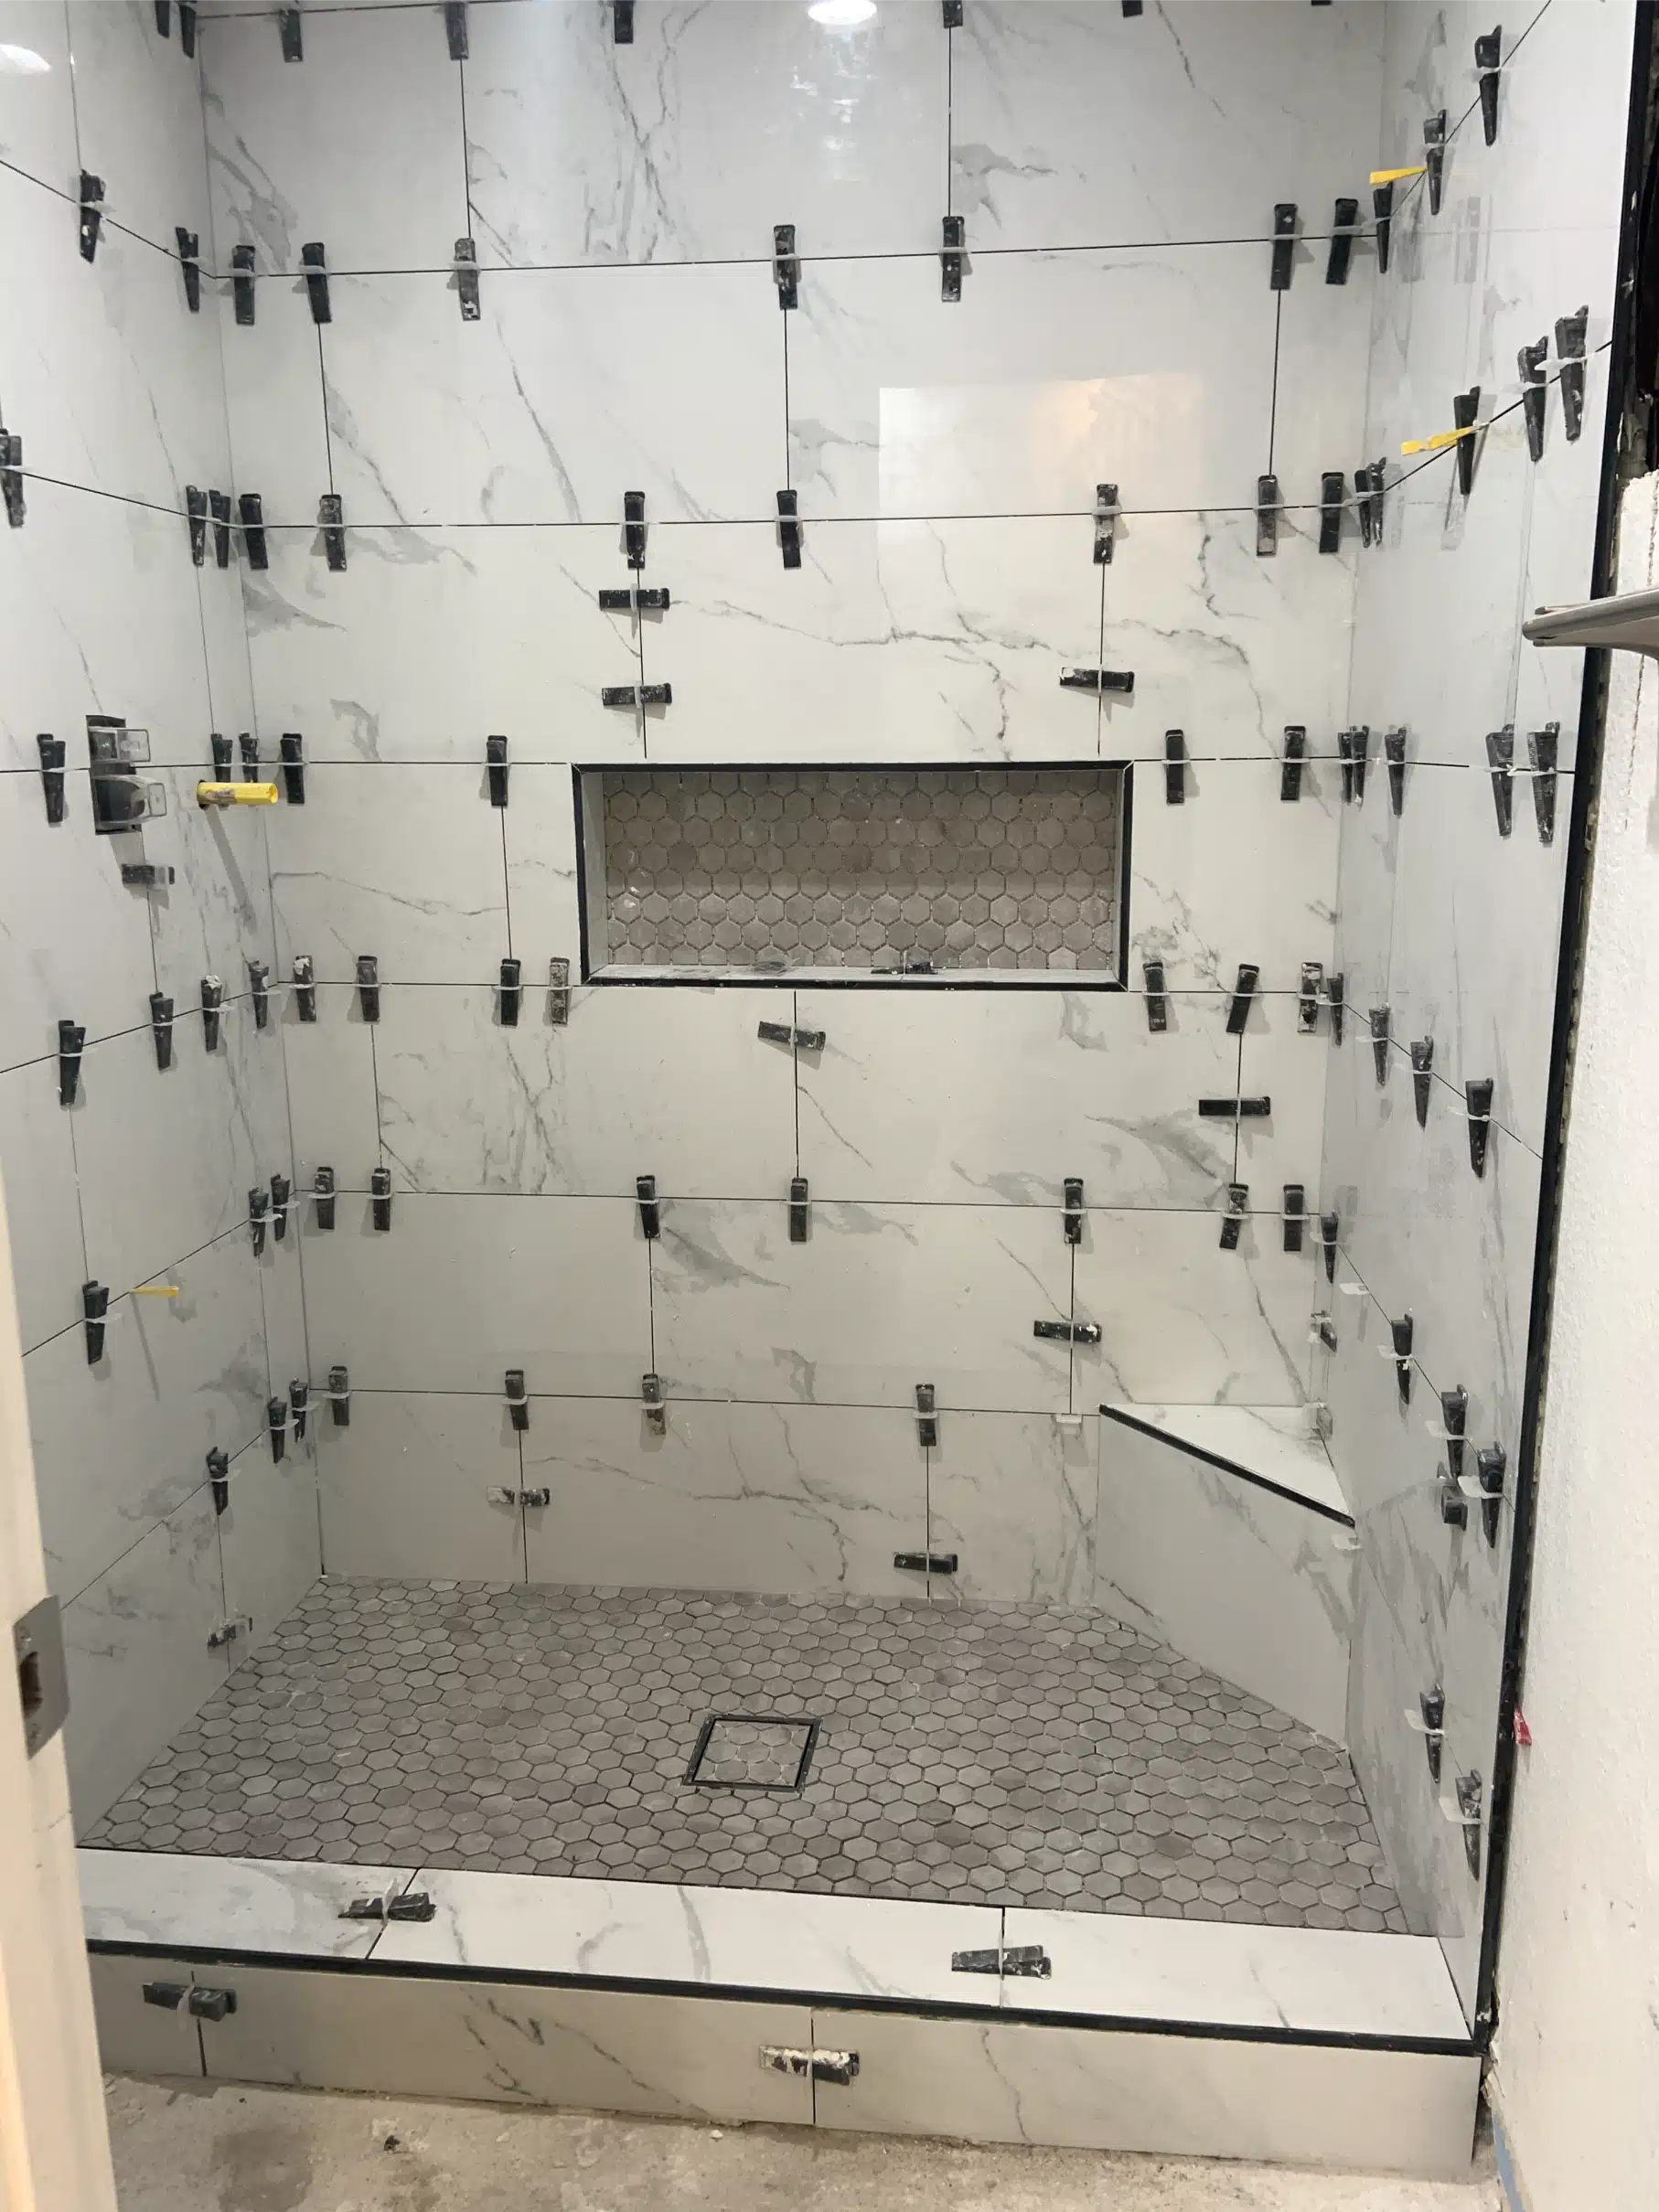
Large-format tile held flush by levelling clips while the mortar cures, which is what stops lippage across long edges.

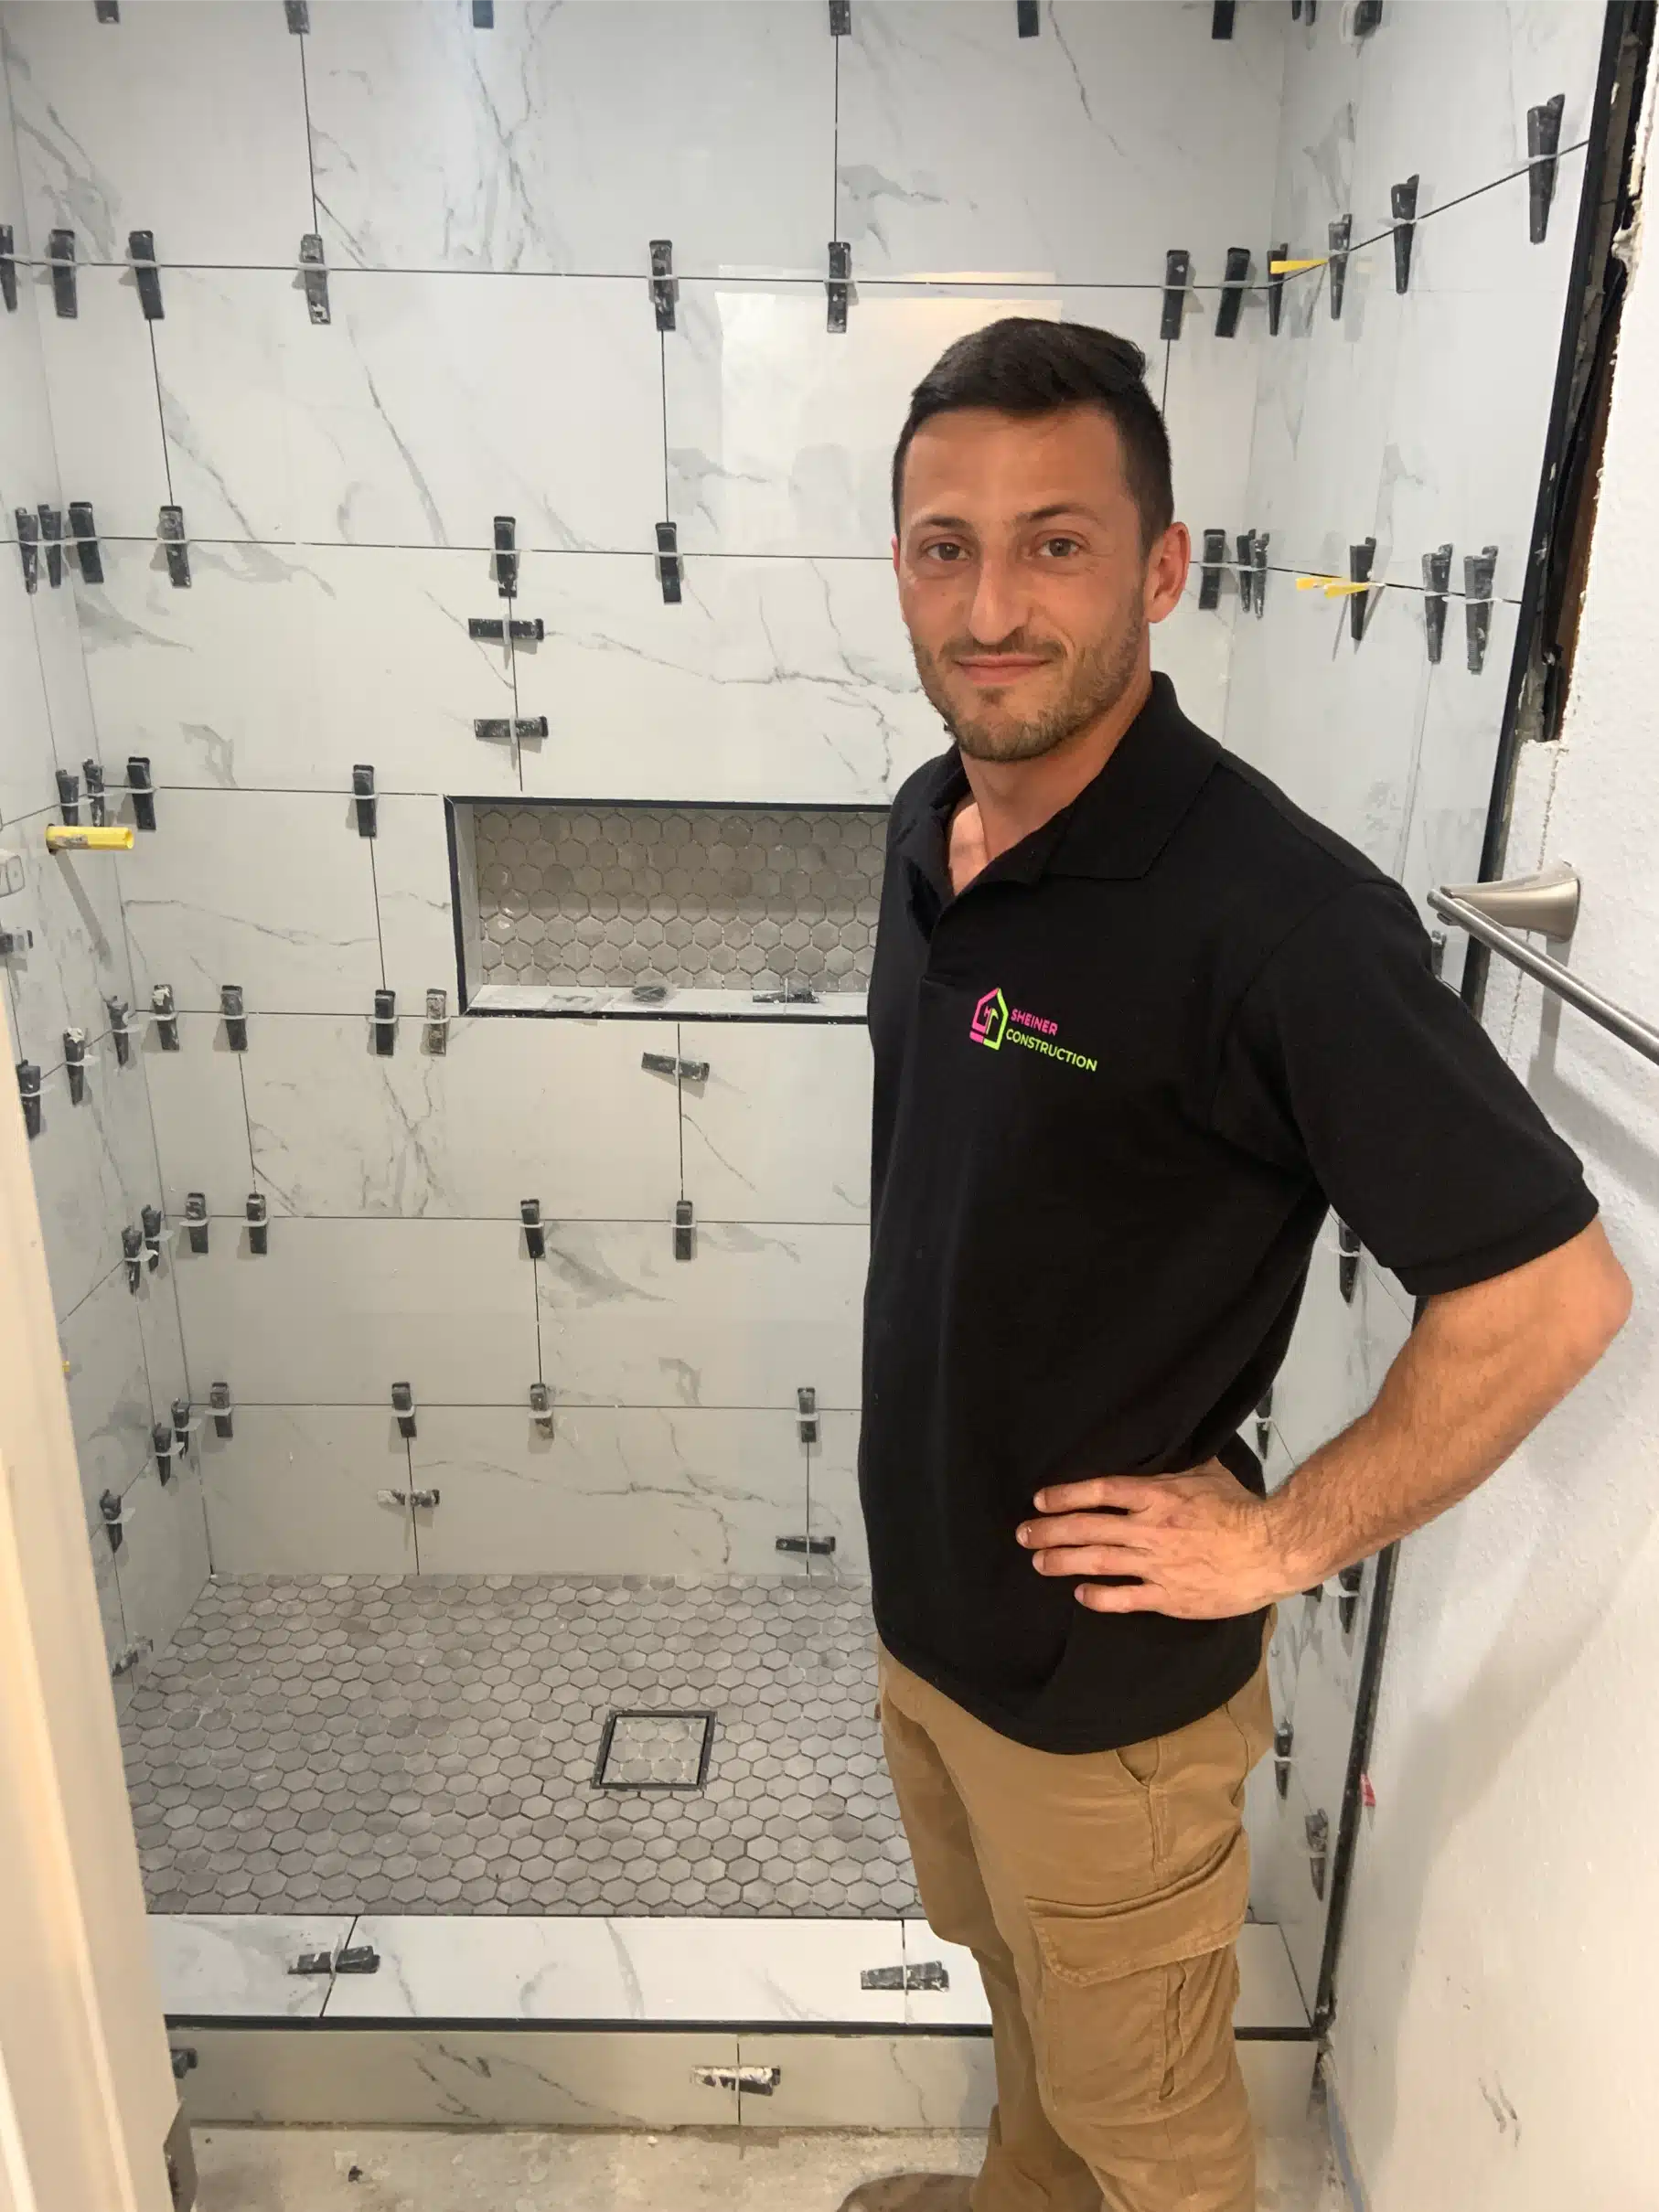
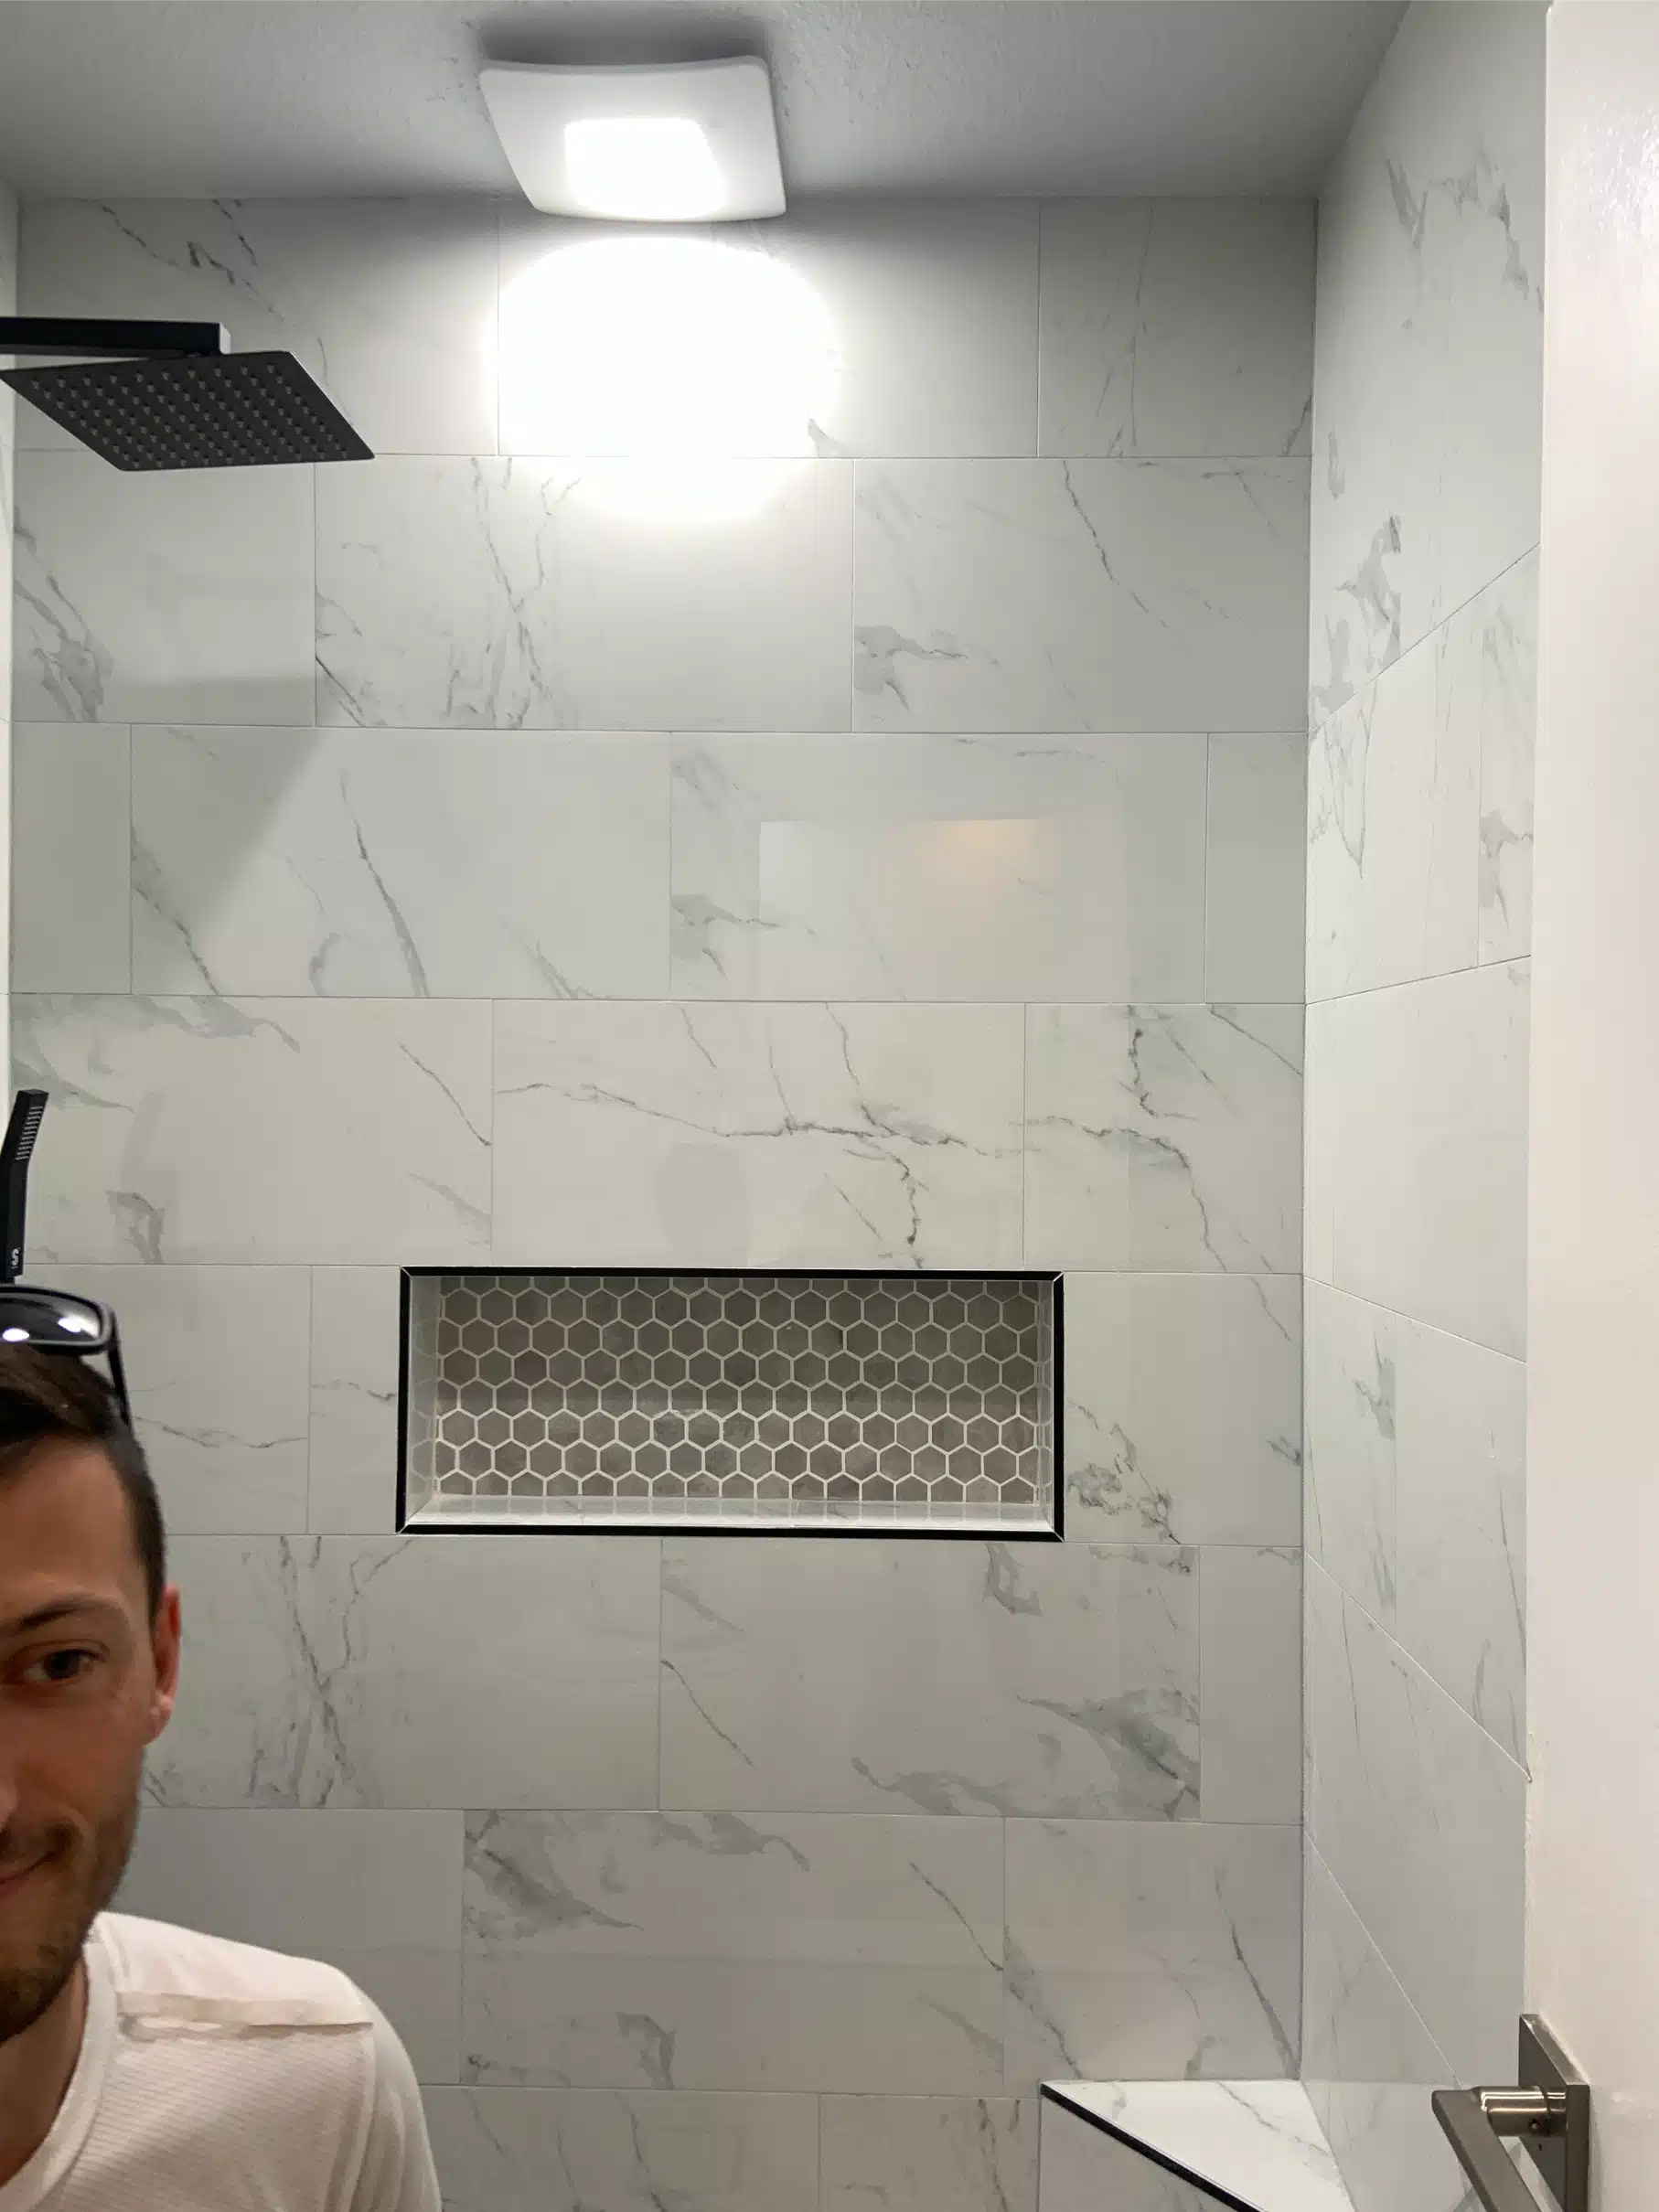
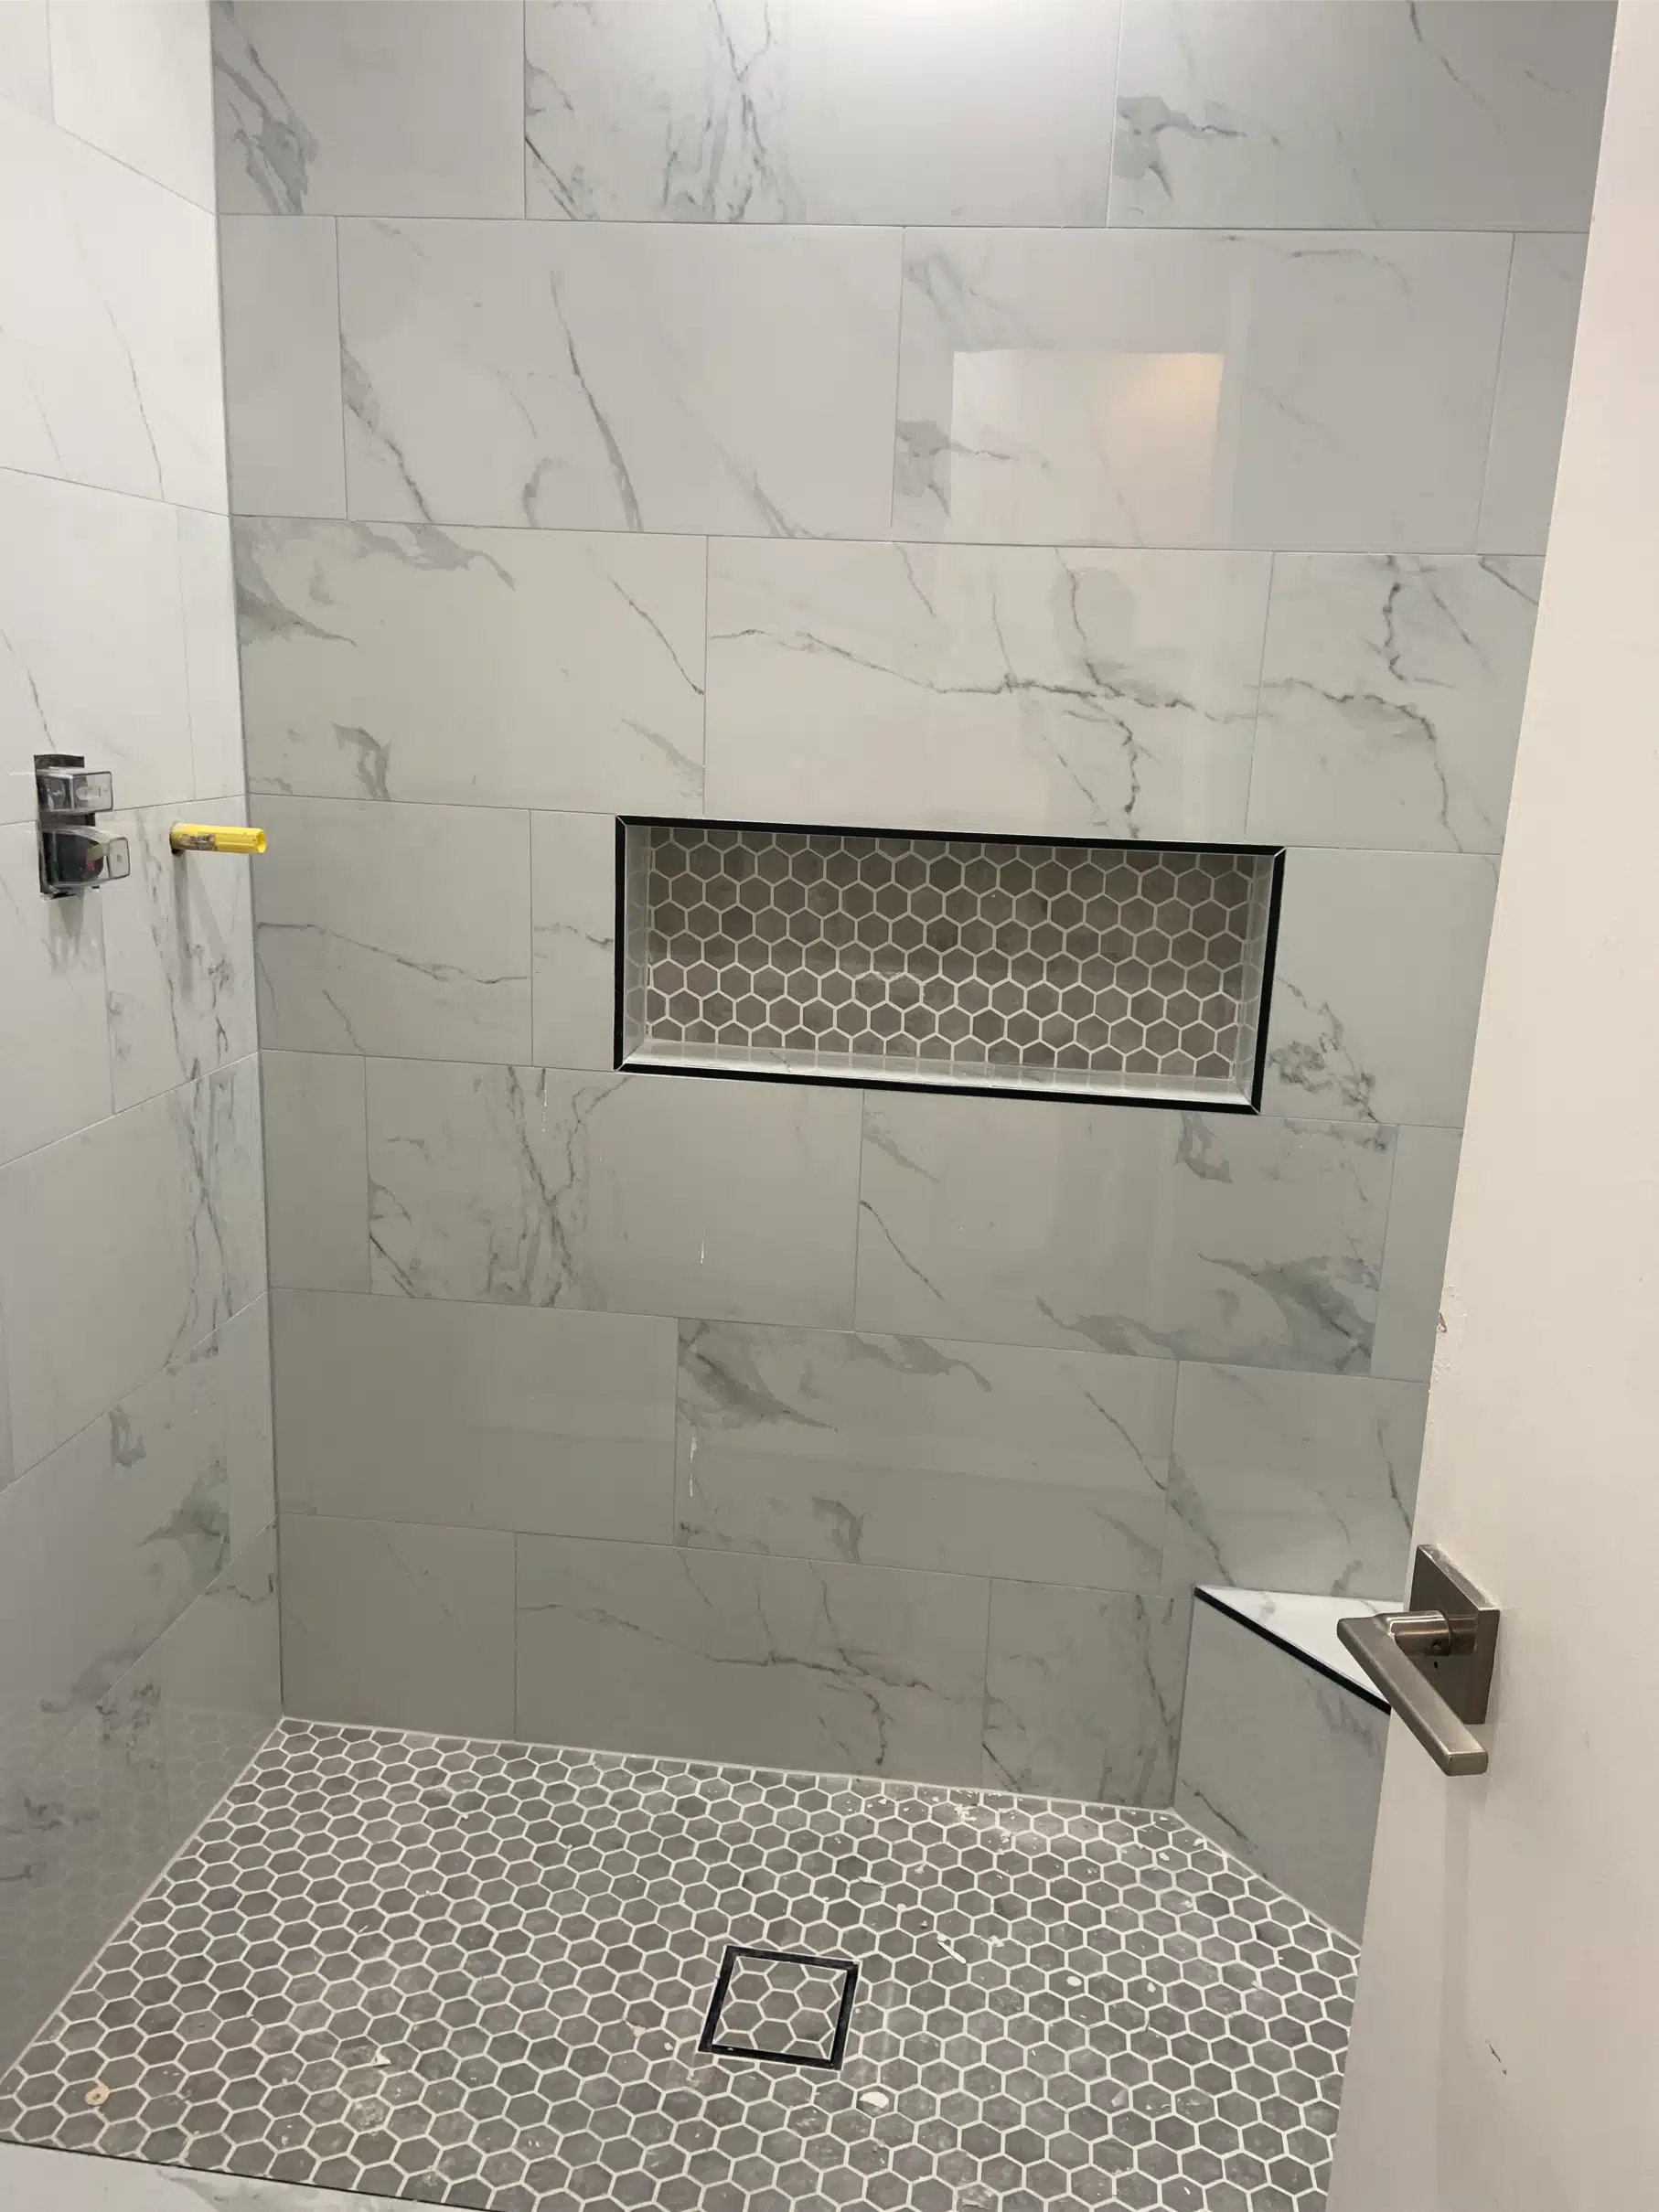
Shower wall tile set with levelling clips still in place, the mosaic niche band and the mosaic shower floor laid
Stage two

Waterproofing, then tile

This photograph was taken mid-installation — the white levelling clips are still on the wall tile. They hold adjacent tiles flush while the mortar cures, which is what stops lippage on a large-format tile where every edge is long enough to show it.

Underneath it all is the part nobody photographs and everybody relies on: a continuous waterproofing membrane across the pan and up the walls, with the linear drain set to fall. Tile is a finish, not a waterproof layer. What keeps water out of the framing is the assembly behind it.

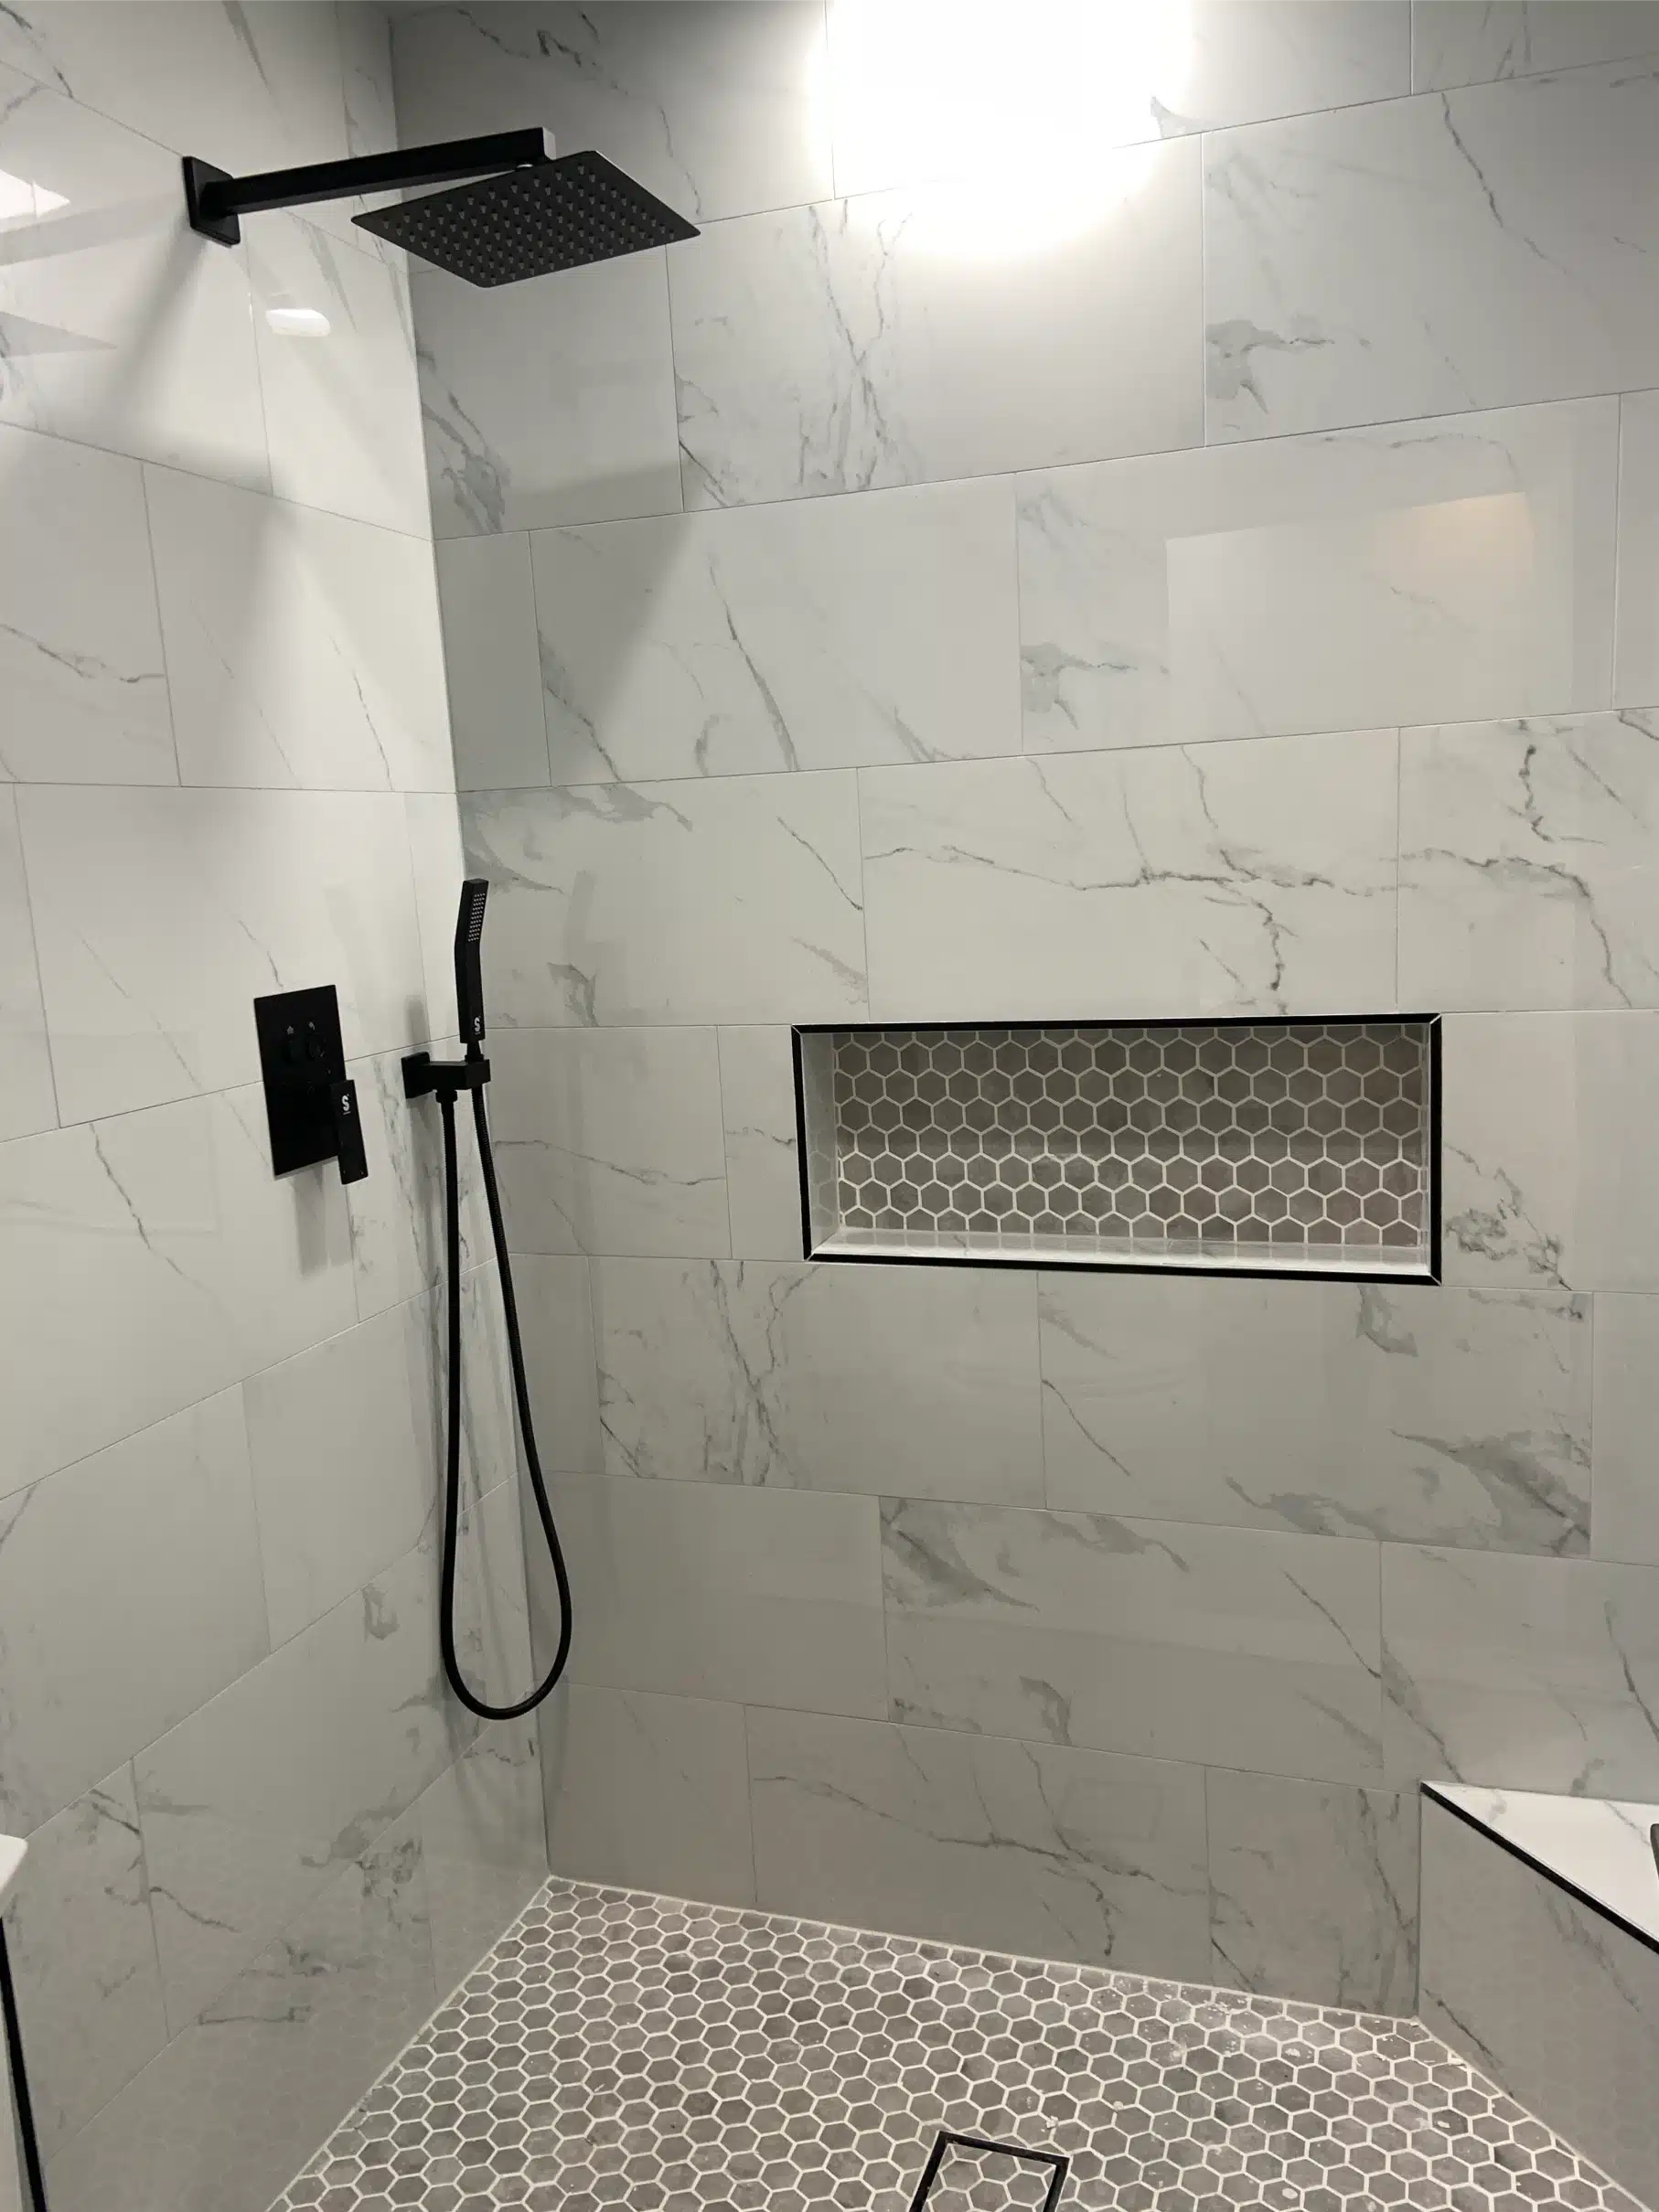
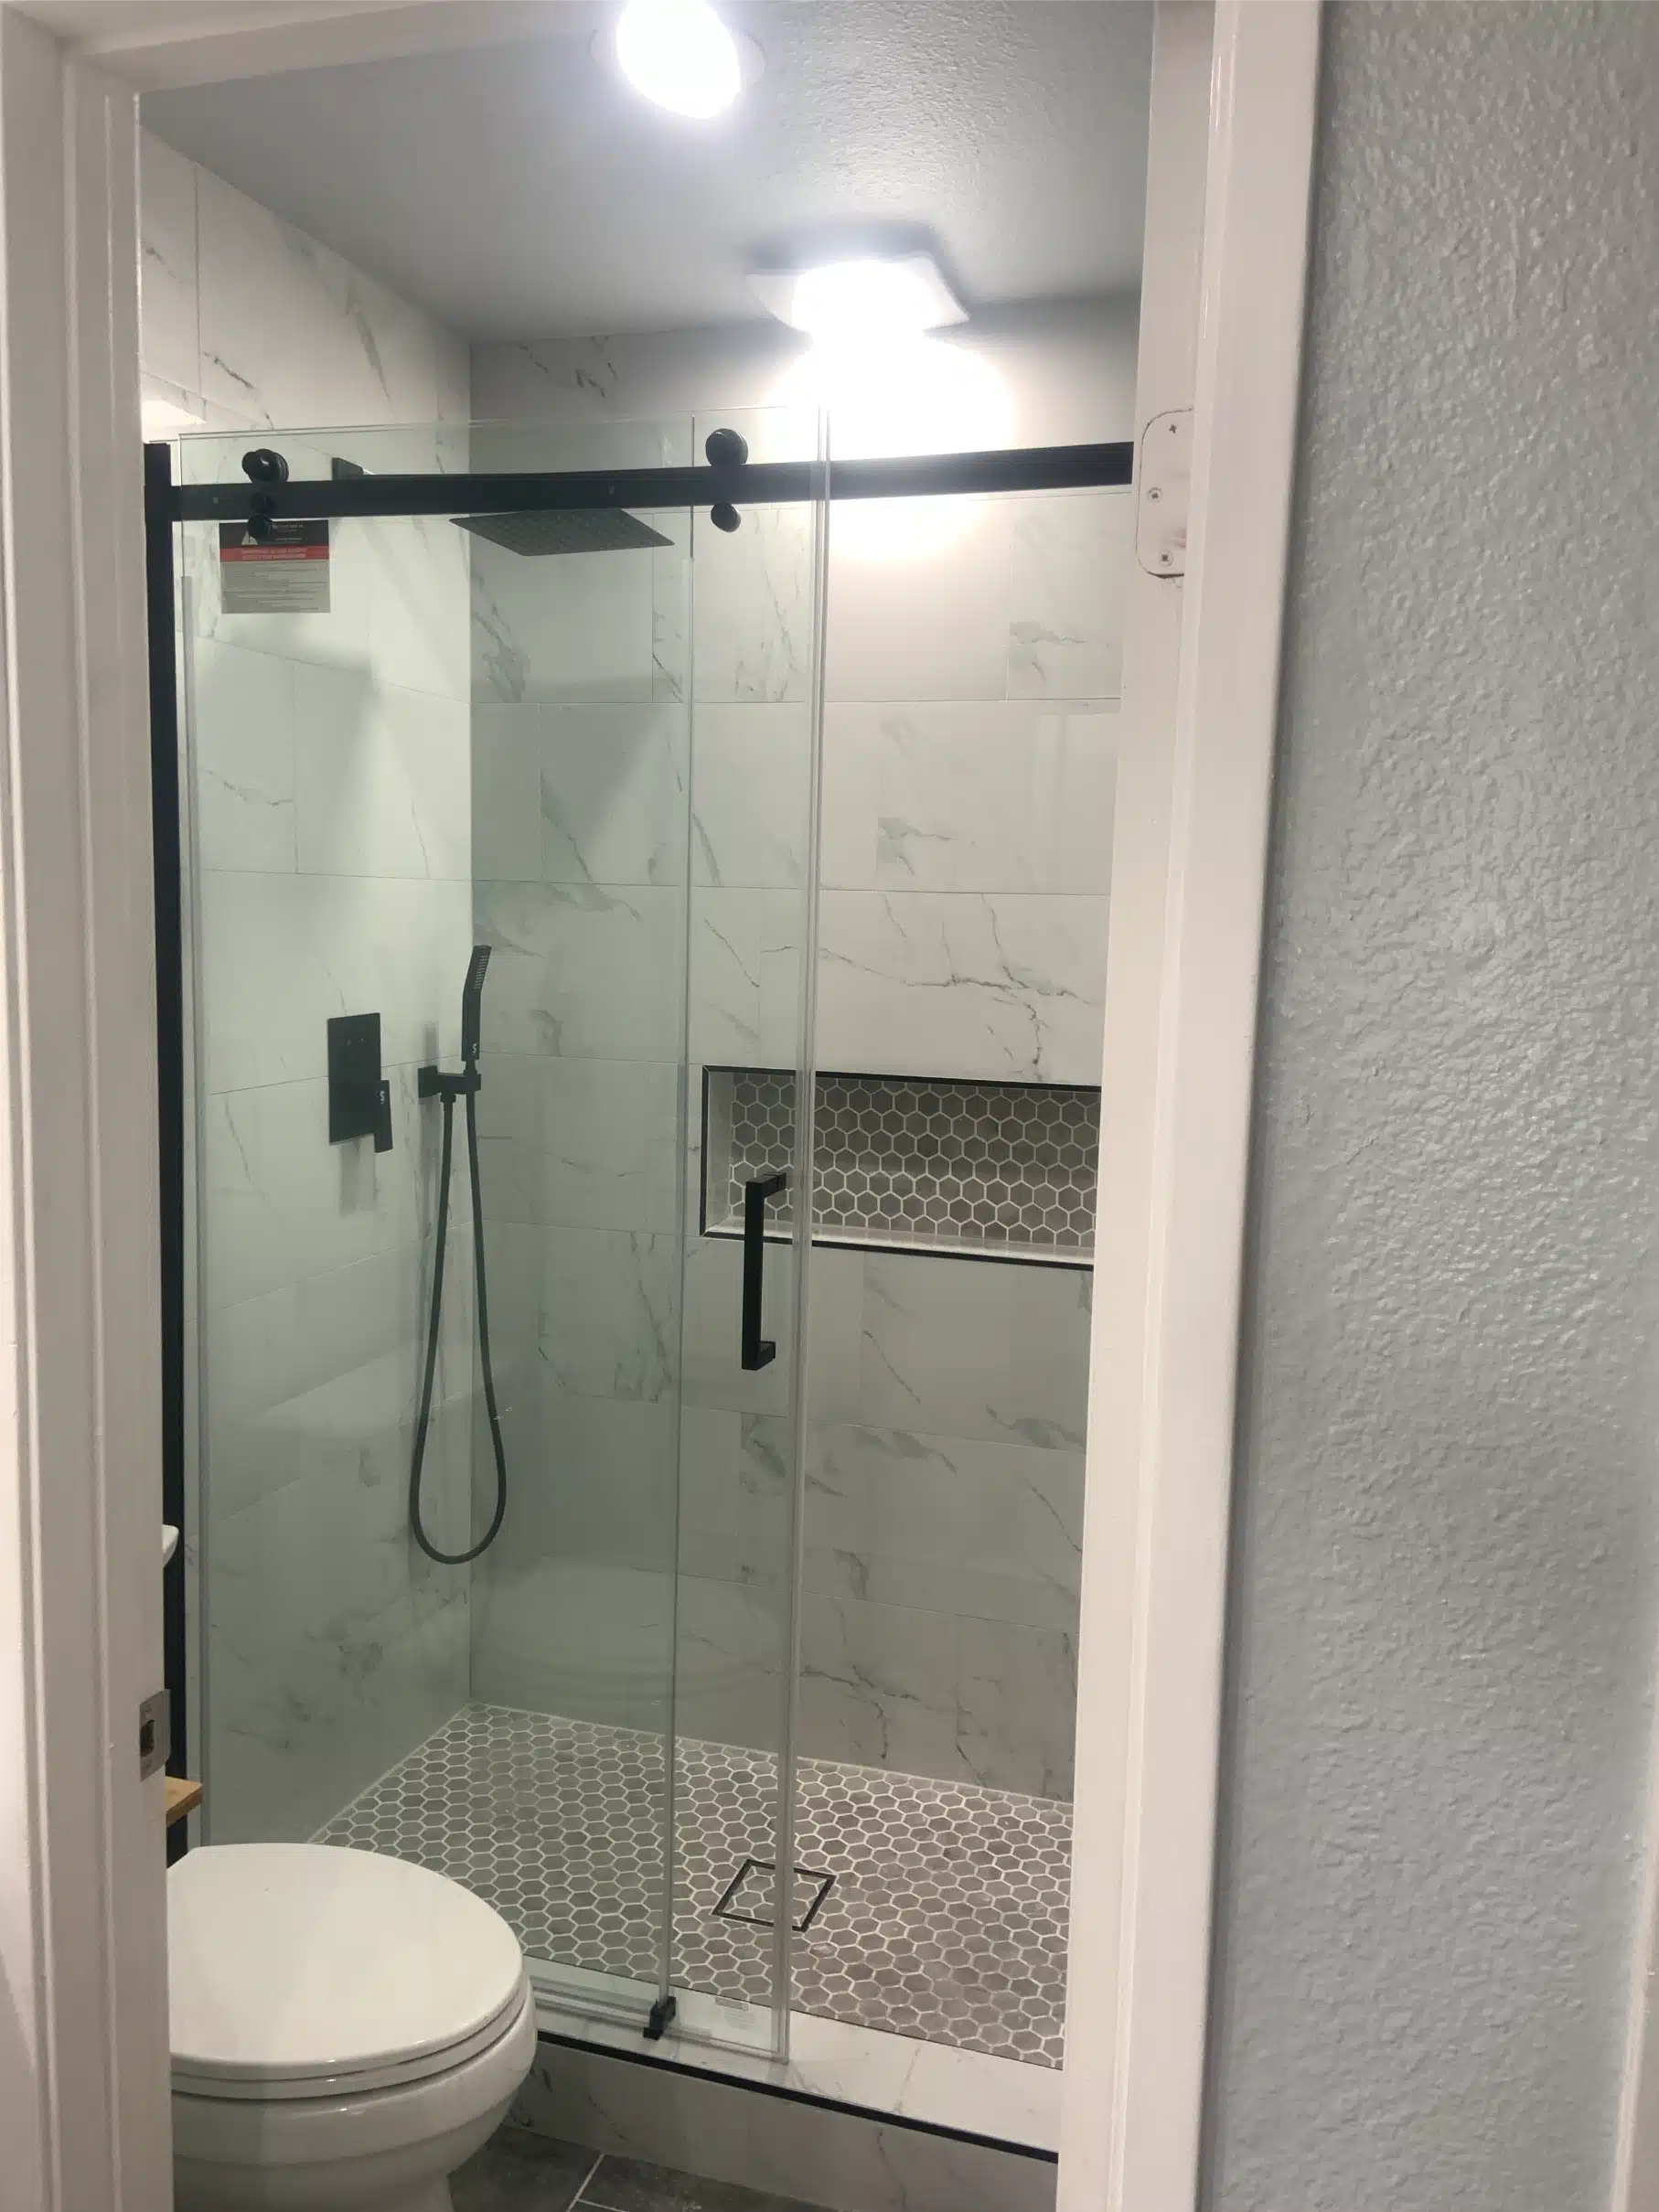
Finished walk-in shower with a matte black shower set, handheld on a slide bar and a recessed mosaic niche
Tile is a finish, not a waterproof layer. What keeps water out is the assembly behind it.
Sheiner Construction · CSLB #1083621
Stage three

The finished room

Large-format marble-look porcelain runs floor to ceiling through the enclosure, broken by a single band of mosaic set into the niche. Using the mosaic only inside the niche gives the recess a defined edge without adding a second pattern to the room.

The shower floor is mosaic rather than large-format, and that is a functional decision before it is an aesthetic one: more grout joints across a wet floor means more grip underfoot, and small tiles conform to the fall toward the drain without needing to be cut into wedges.

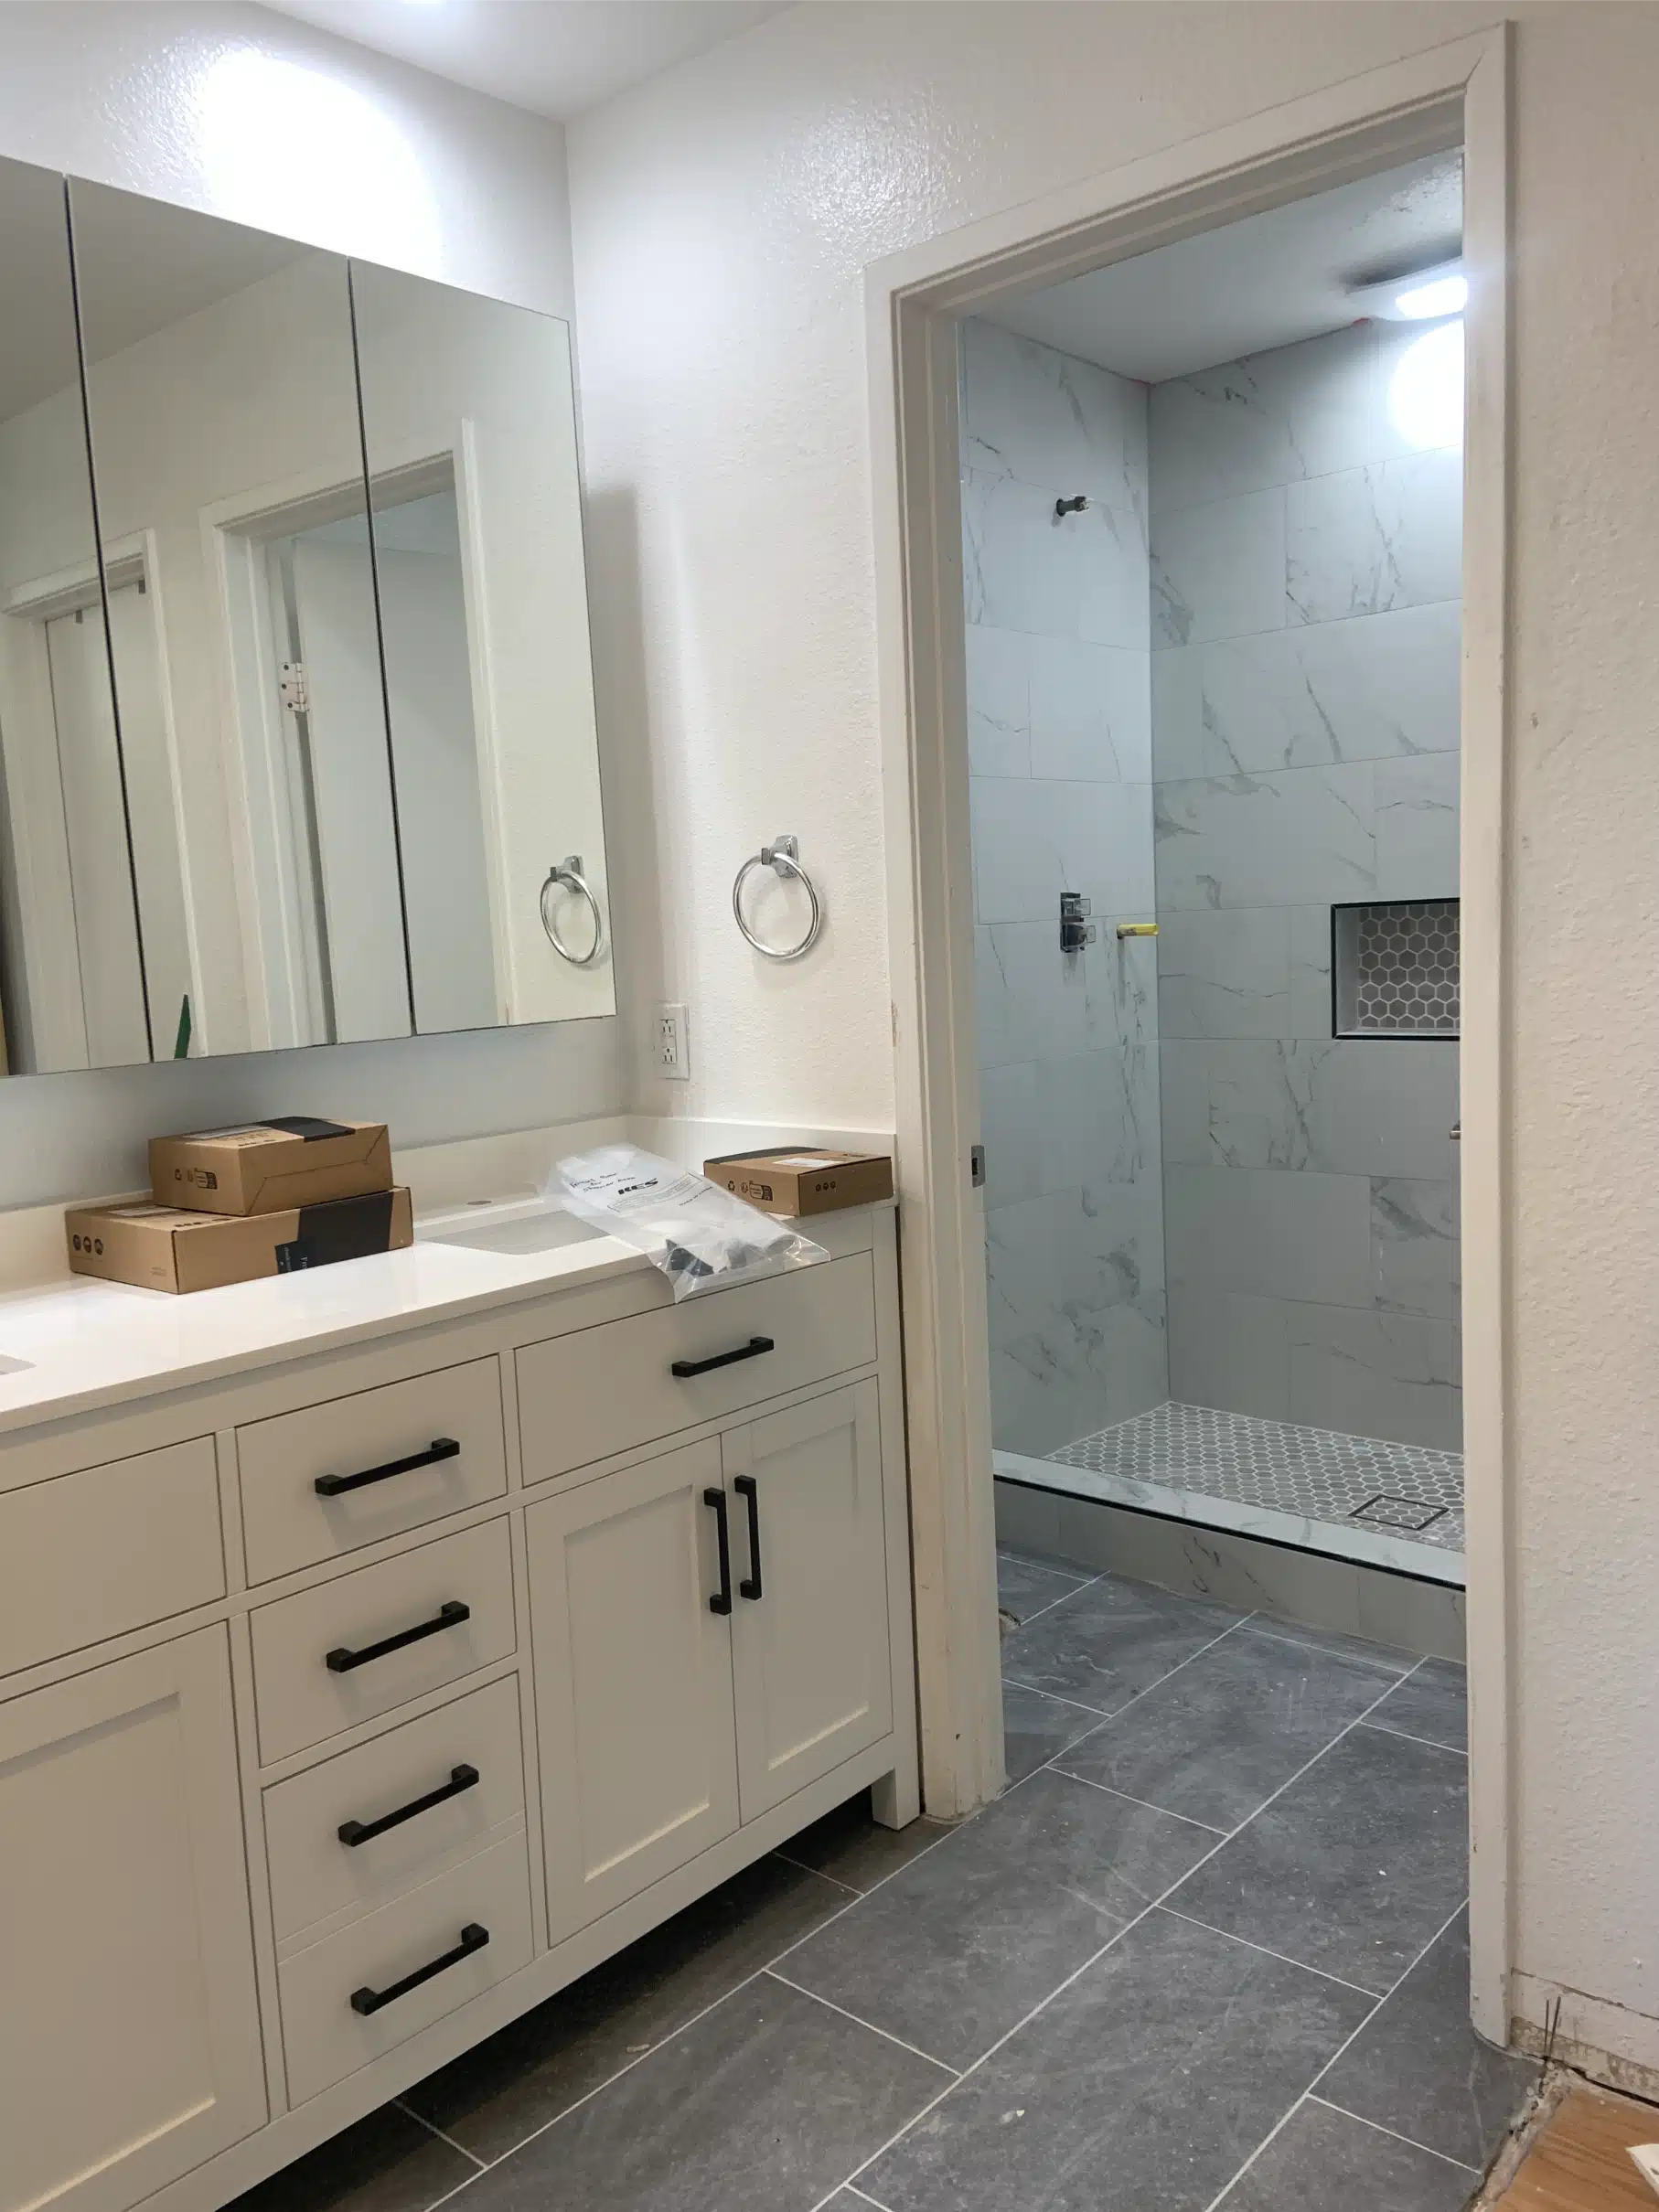
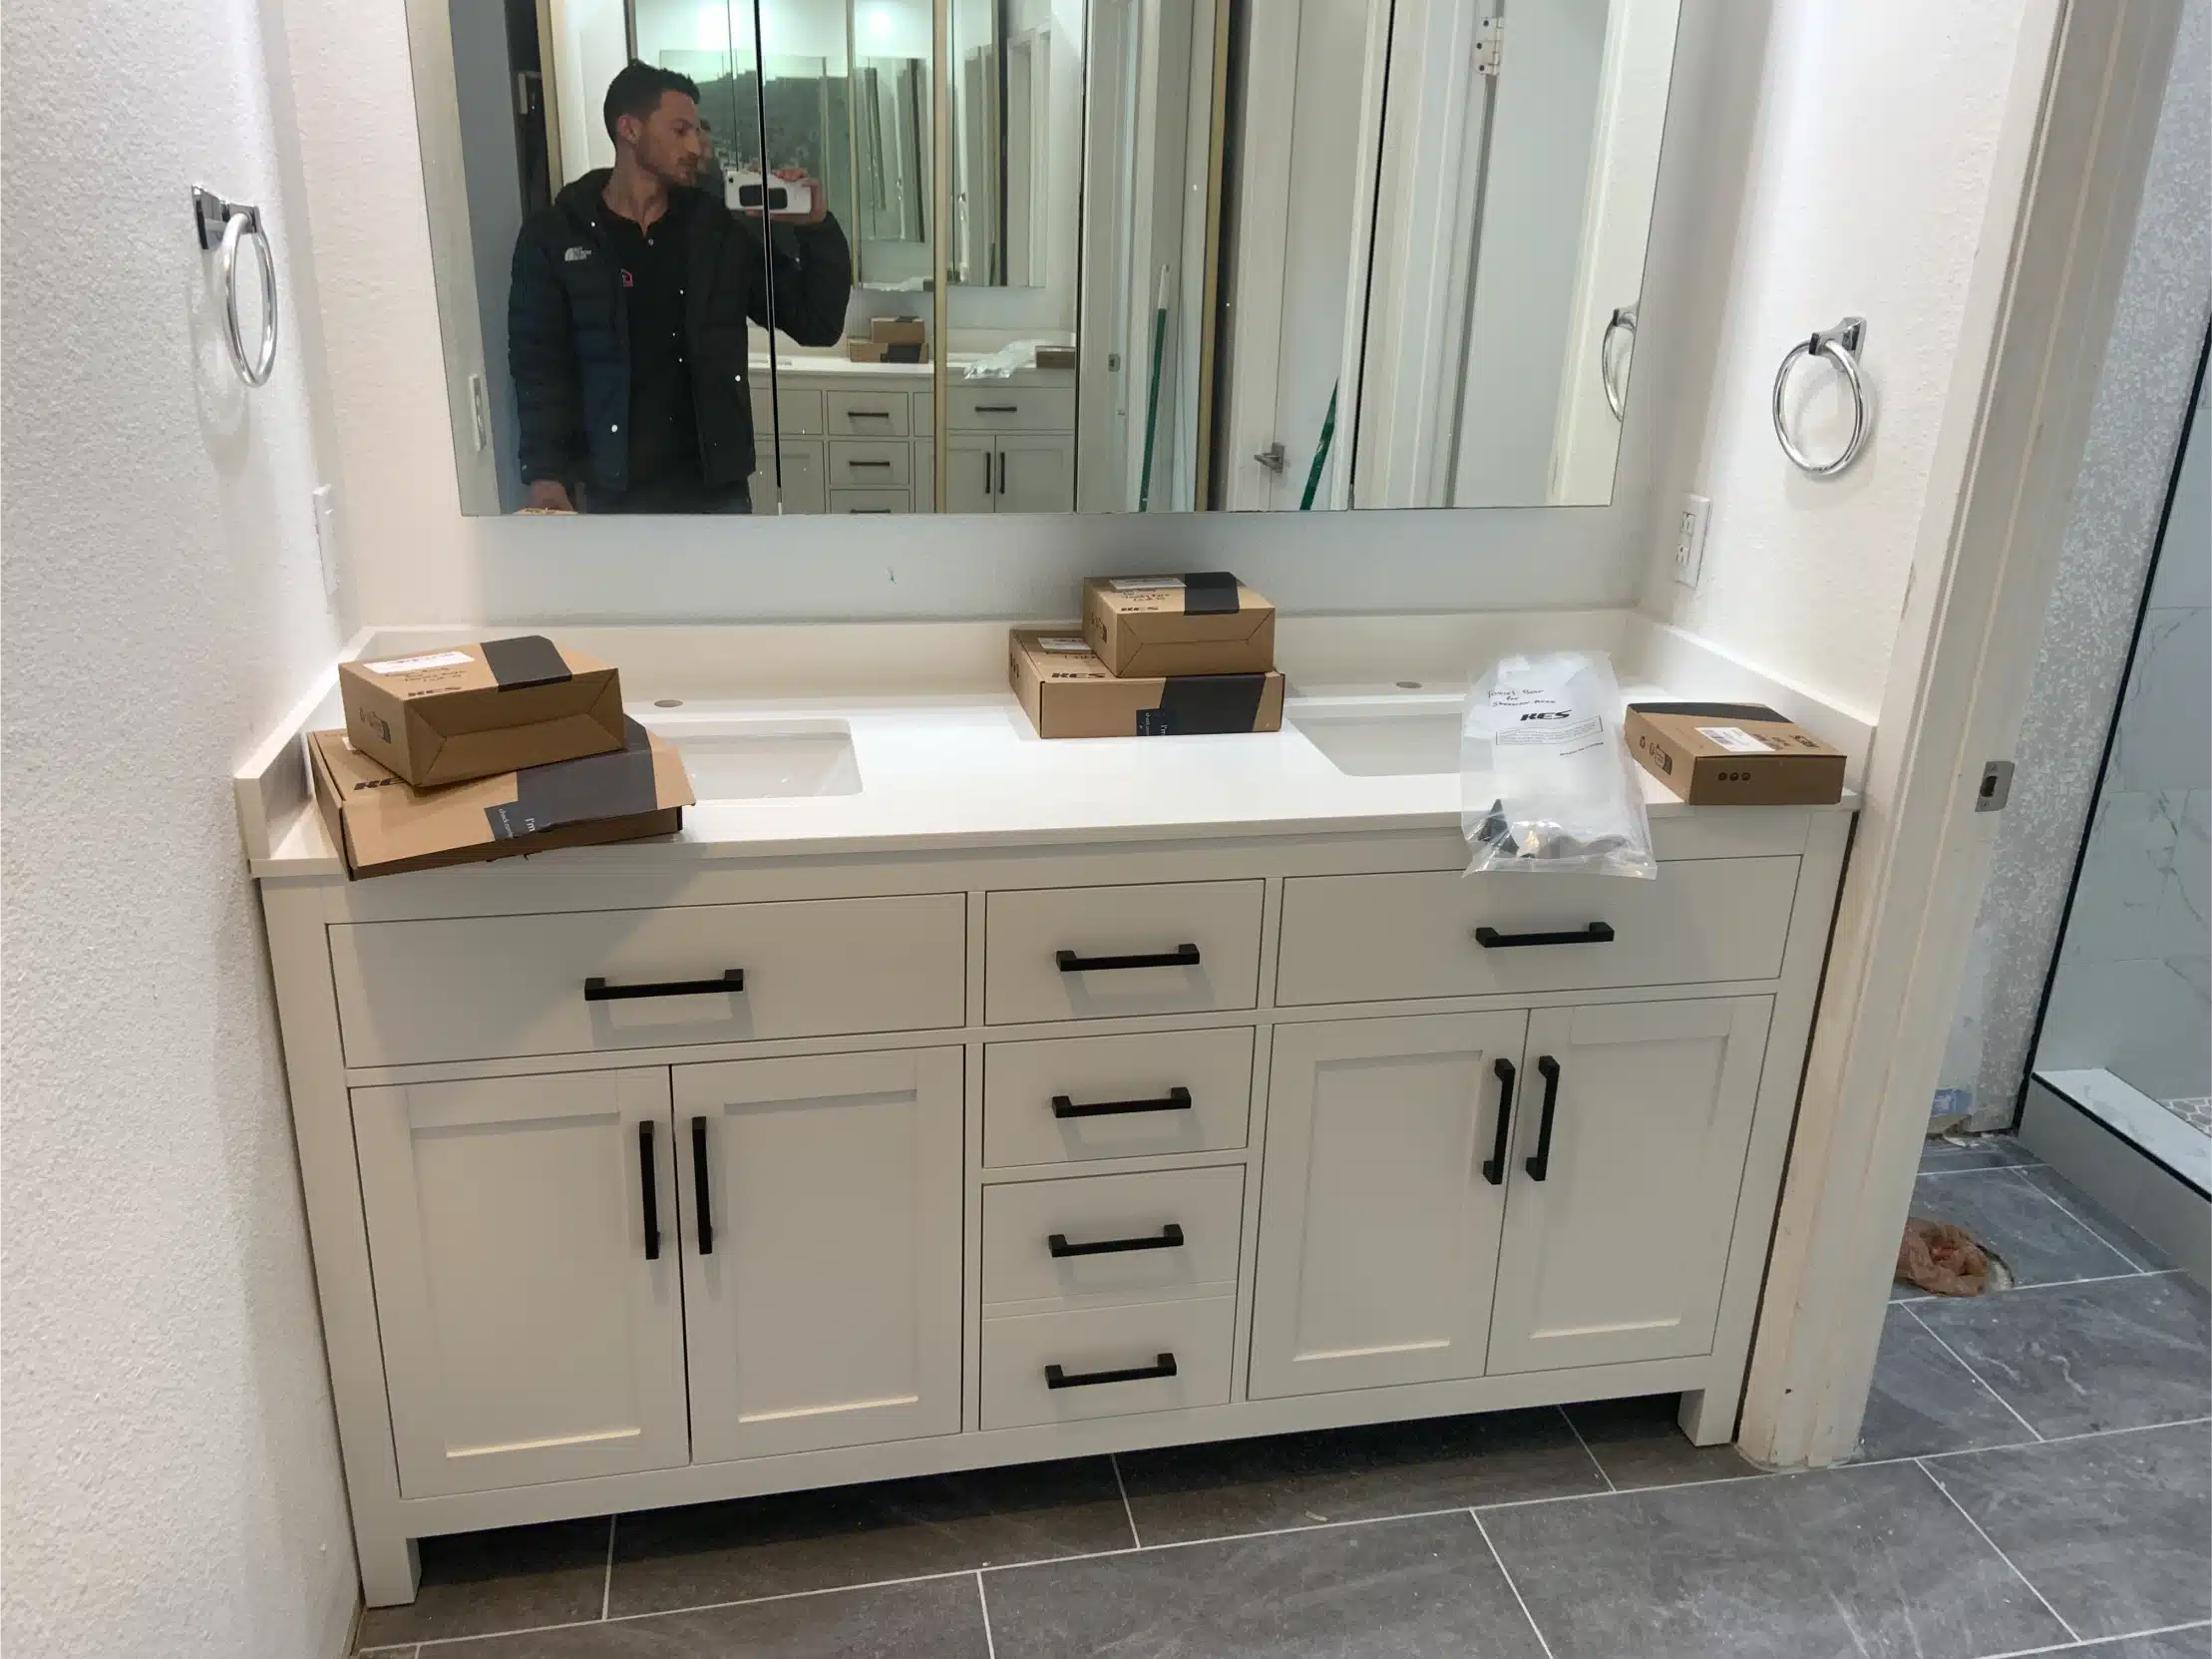
Matte black fixtures carry through — rain head, handheld on a slide bar, valve trim and the framed sliding enclosure — against a white shaker vanity with black hardware.

Completed San Diego bathroom with a white shaker vanity, black hardware and the glass walk-in shower beyond
04
Details

Through the build

Protected floor and masked surfaces while the vanity wall is worked on
The bathroom part-finished, looking through from the vanity to the shower
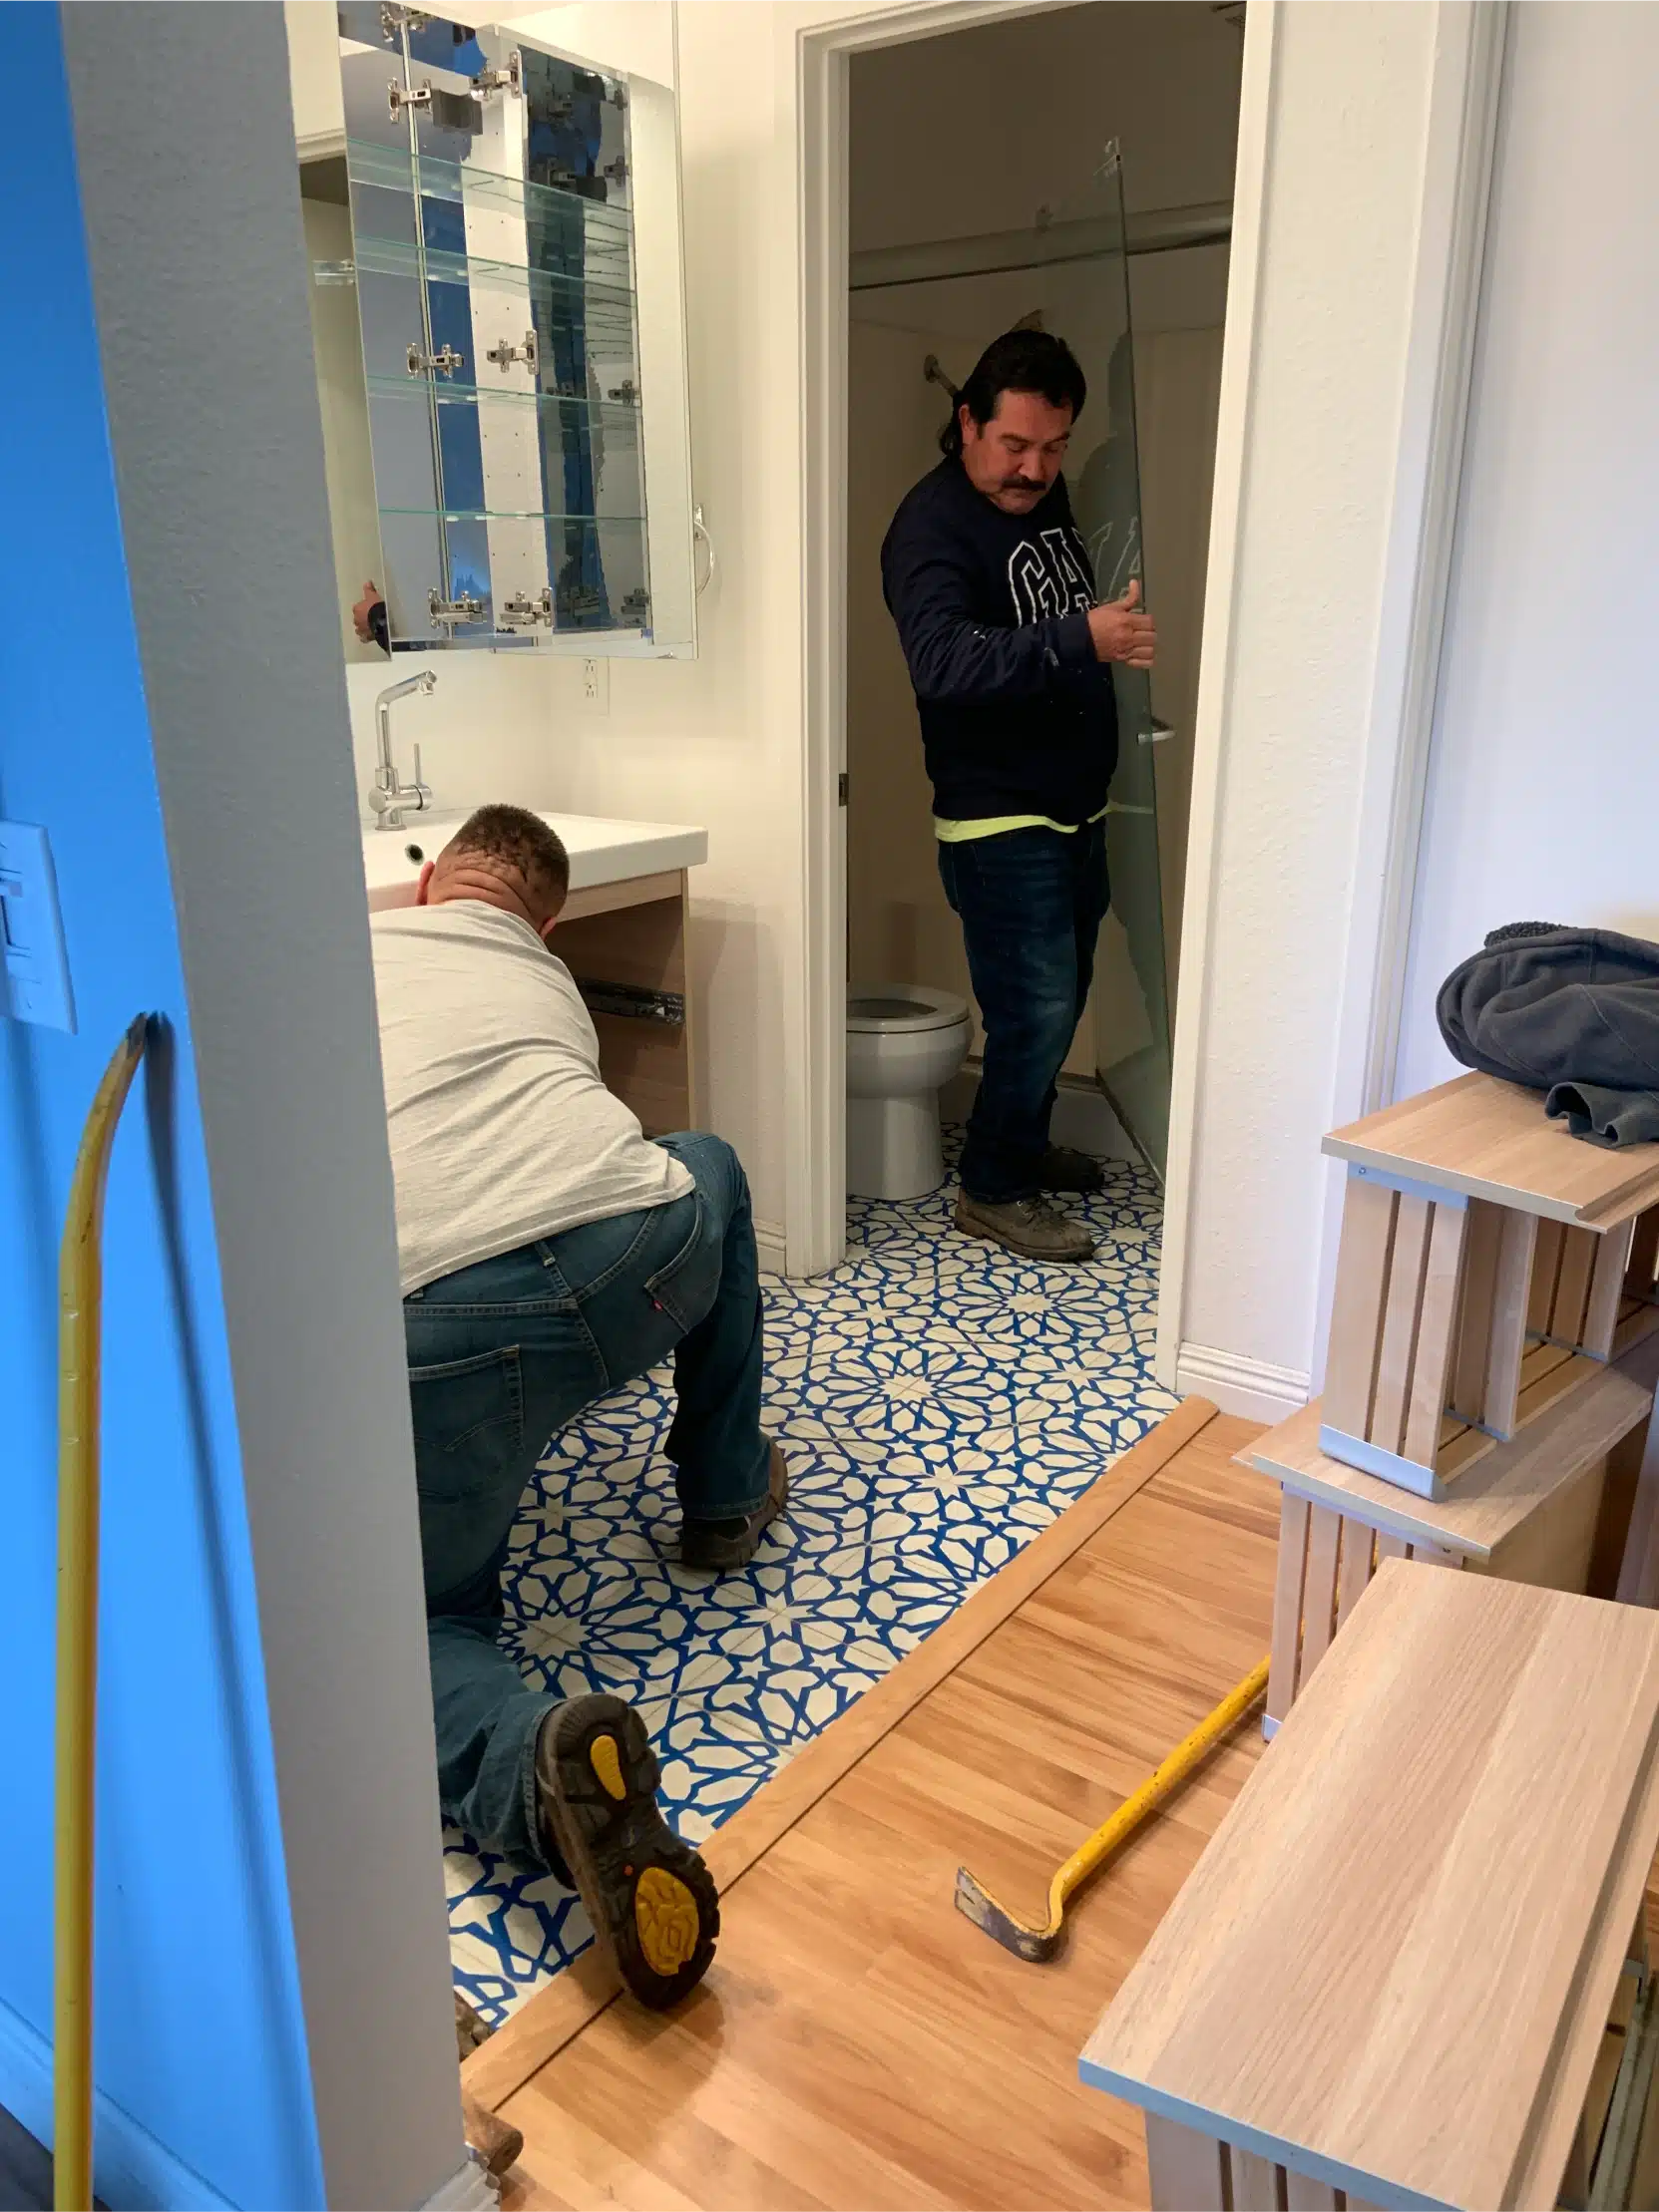
The new vanity set in place before the fixtures were fitted
Joseph Sheiner in the shower enclosure while the wall tile is still being set
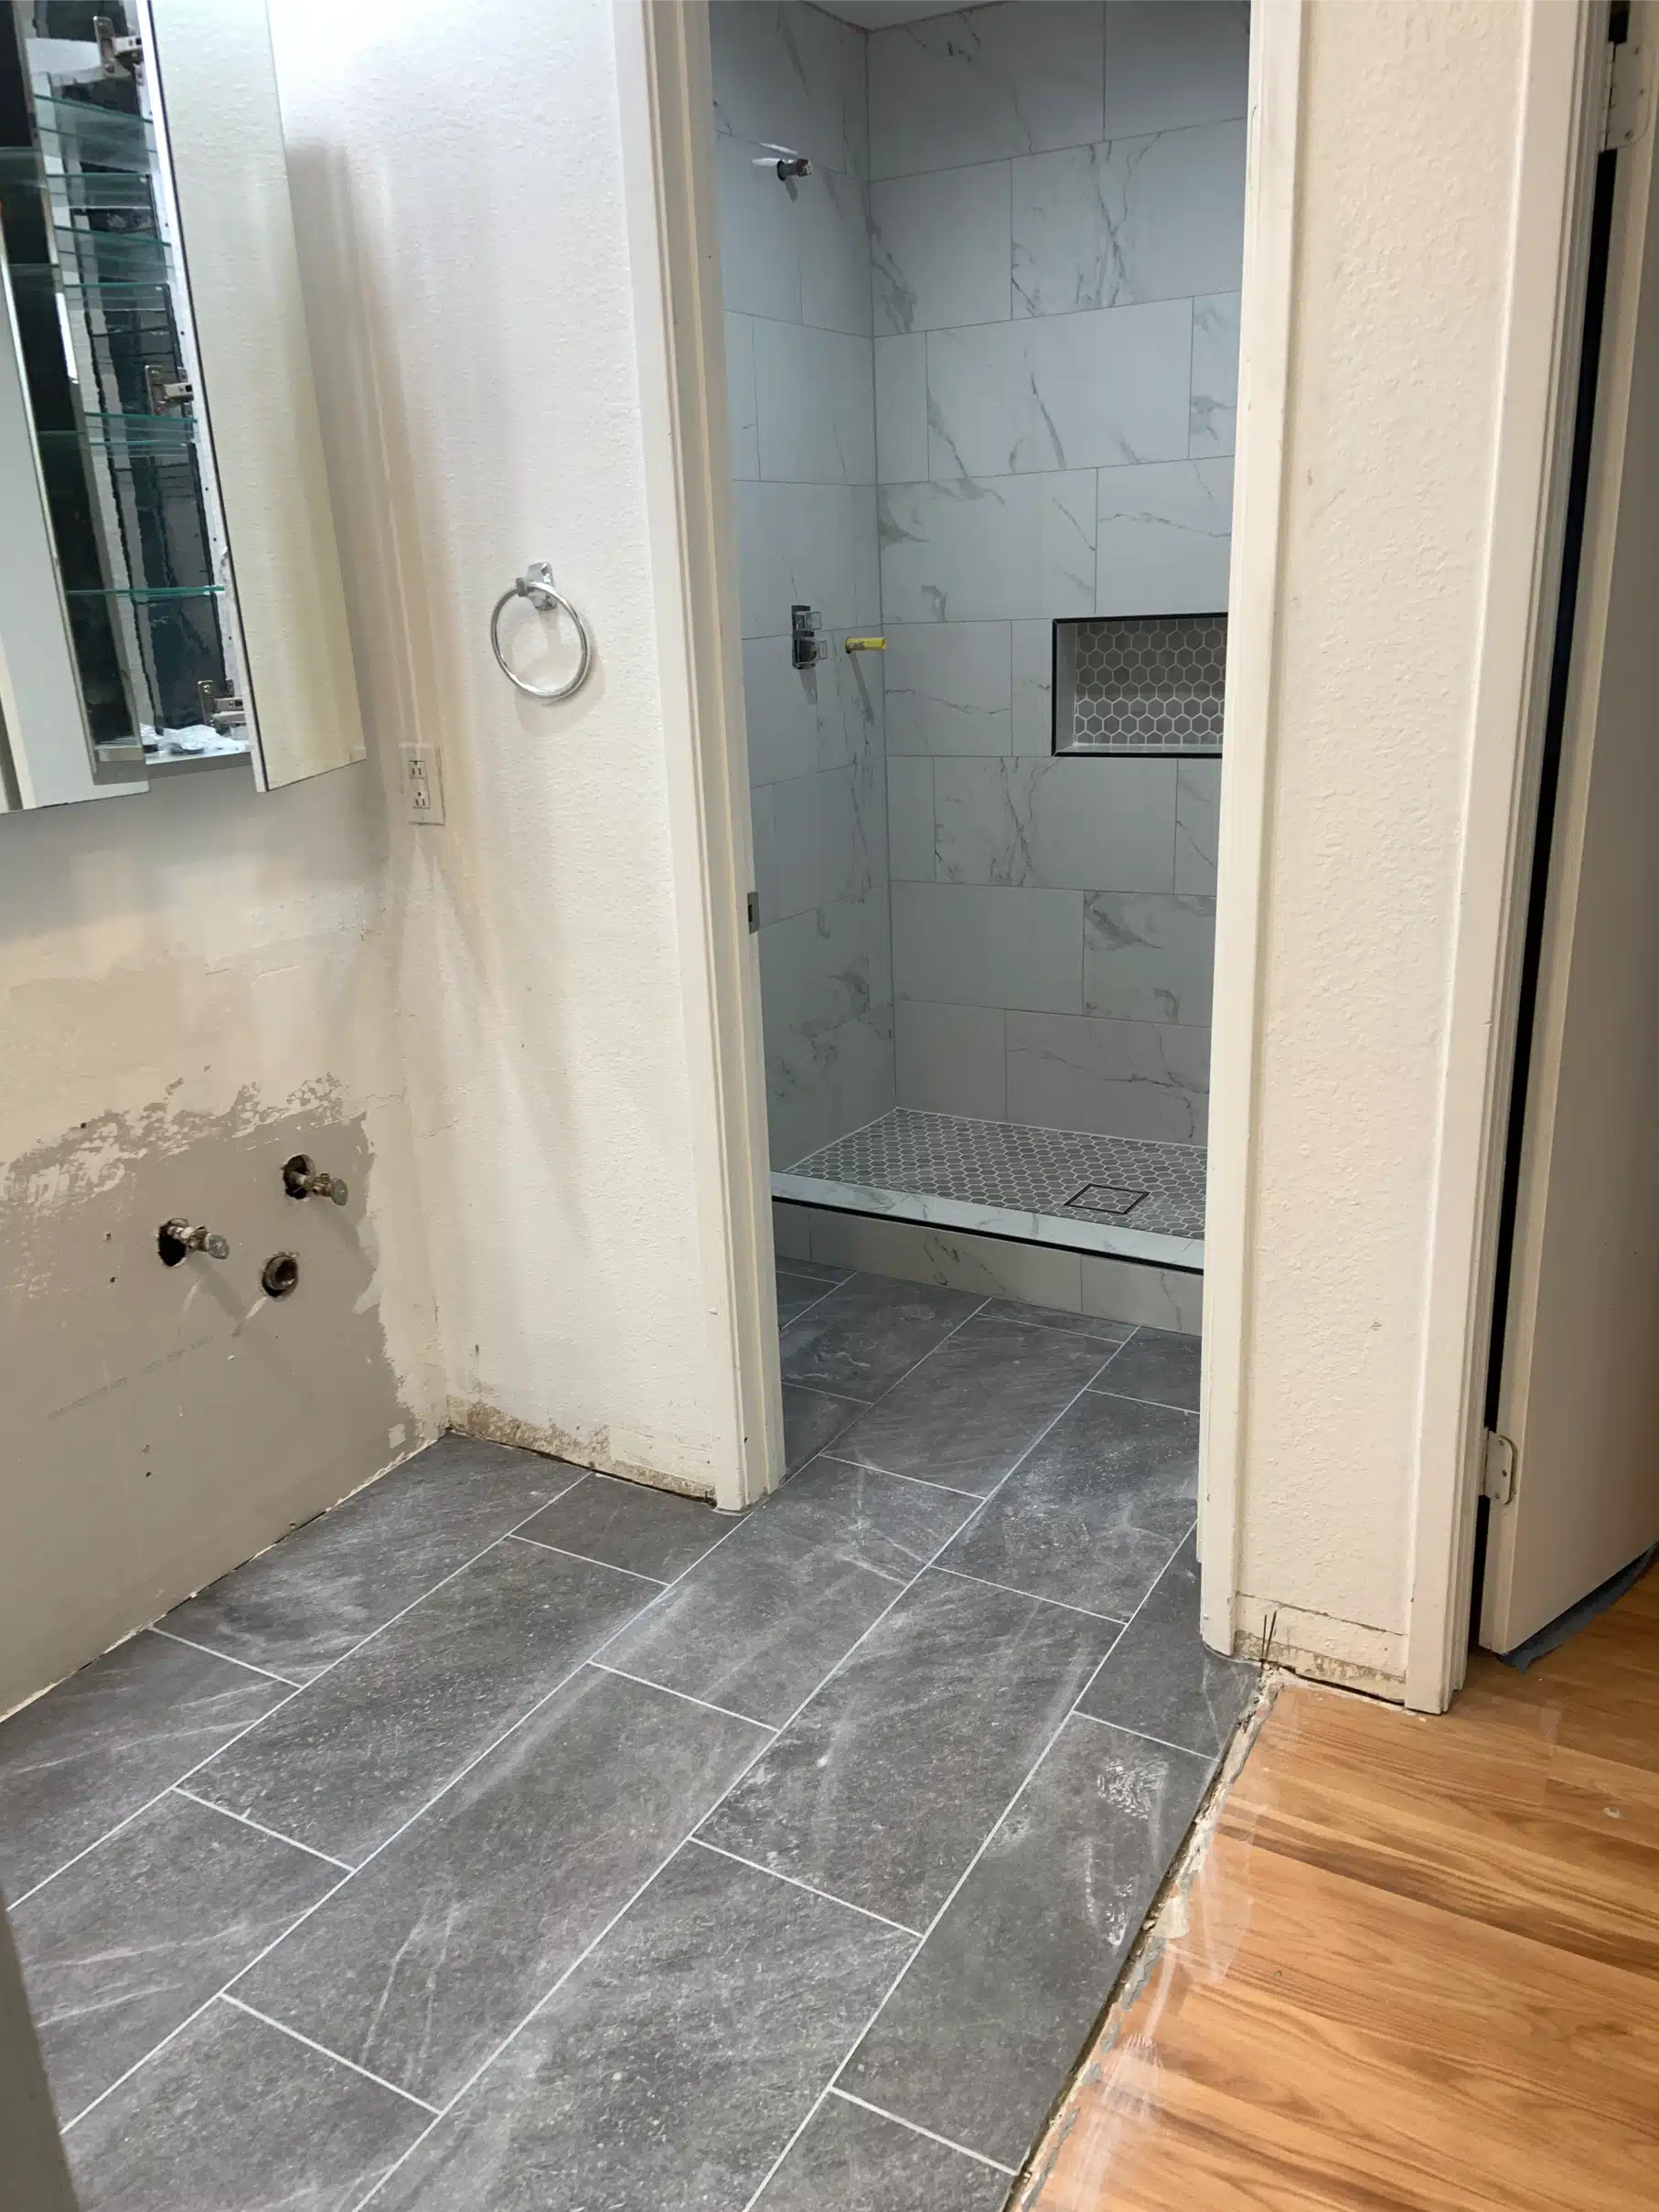
Plank-format floor tile run through the bathroom to the doorway
Matte black rain head mounted above the recessed mosaic niche
Drag to explore
Finished bathroom with a black-framed sliding glass shower enclosure and plank-format floor tile
The result

A shower built to be opened once

The finished room is deliberately restrained — one tile, one metal, one accent. What separates it from a surface refresh is everything in the first two photographs: the blocking, the valve heights, the membrane and the fall to the drain.

Every stage was permitted and inspected under CSLB License #1083621. A bathroom done this way should not need opening again for a long time, which is the only real measure of whether it was done properly.

SHEINER
Start your project

Planning a bathroom remodel?

We will walk the room, confirm what the scope triggers under your jurisdiction, and show you the assembly before you see a tile sample.

Services used on this project

CSLB License #1083621 · Licensed, bonded & insured